Tubi
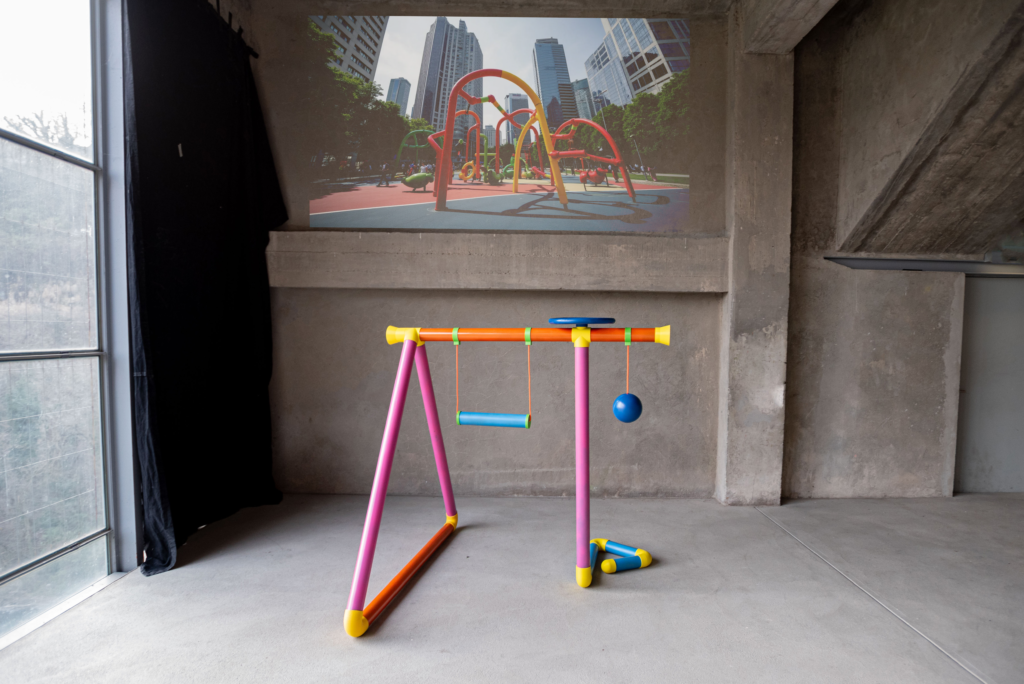
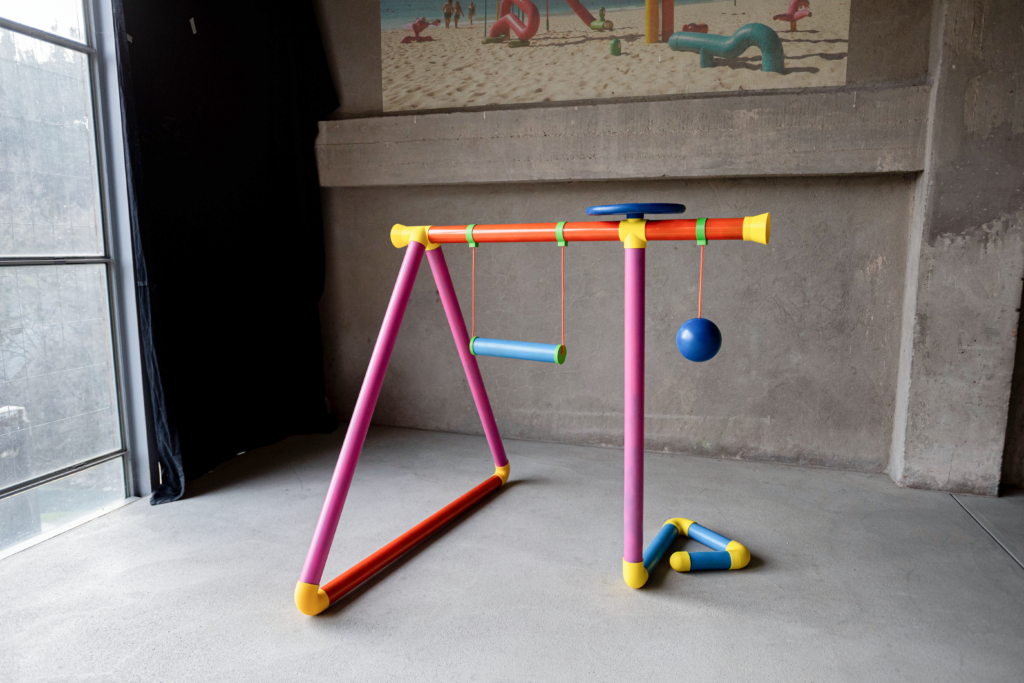
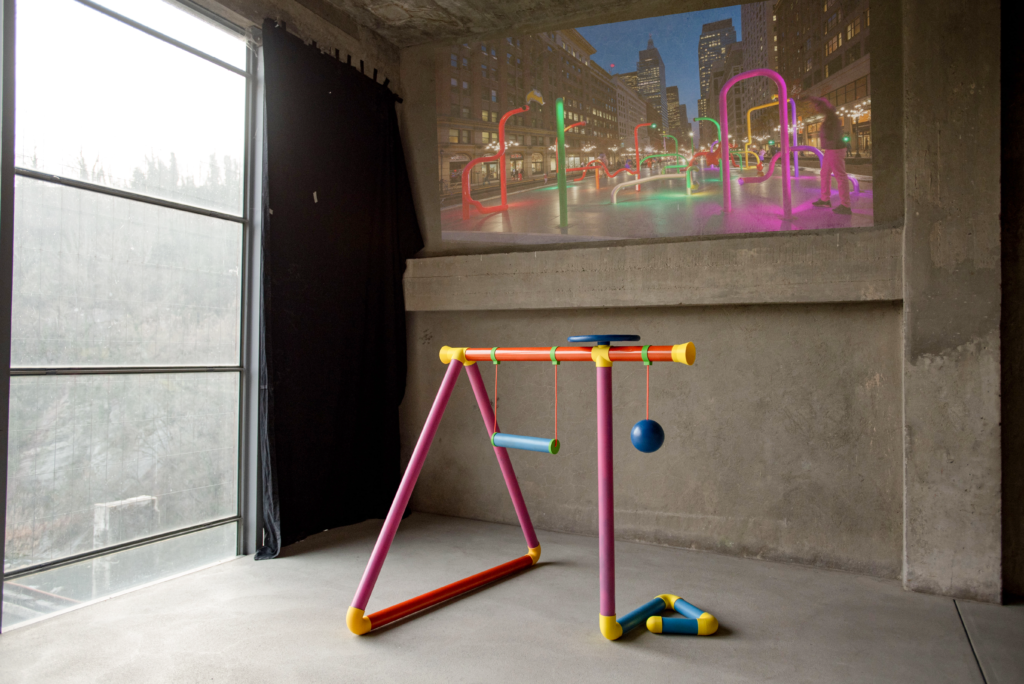
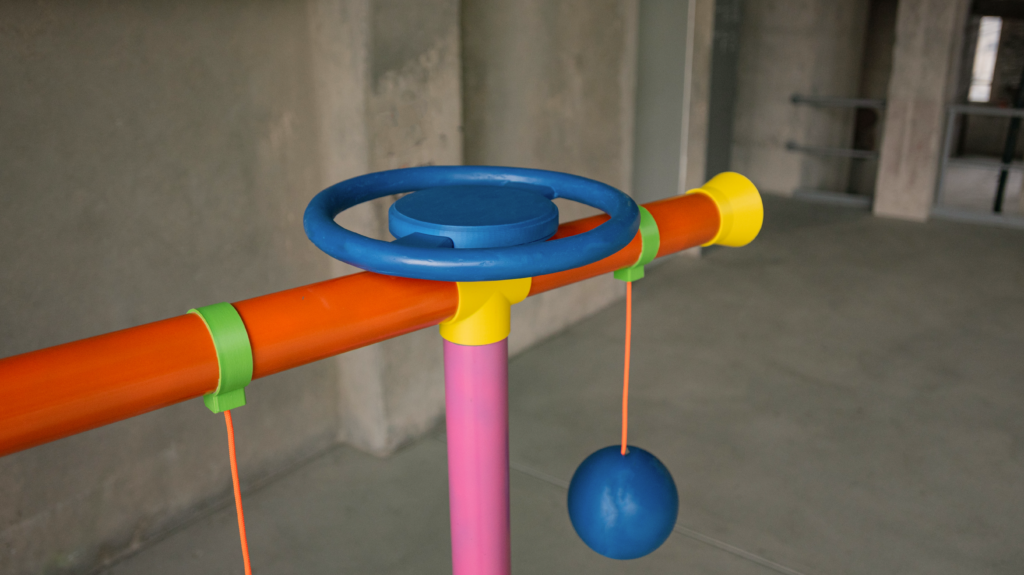
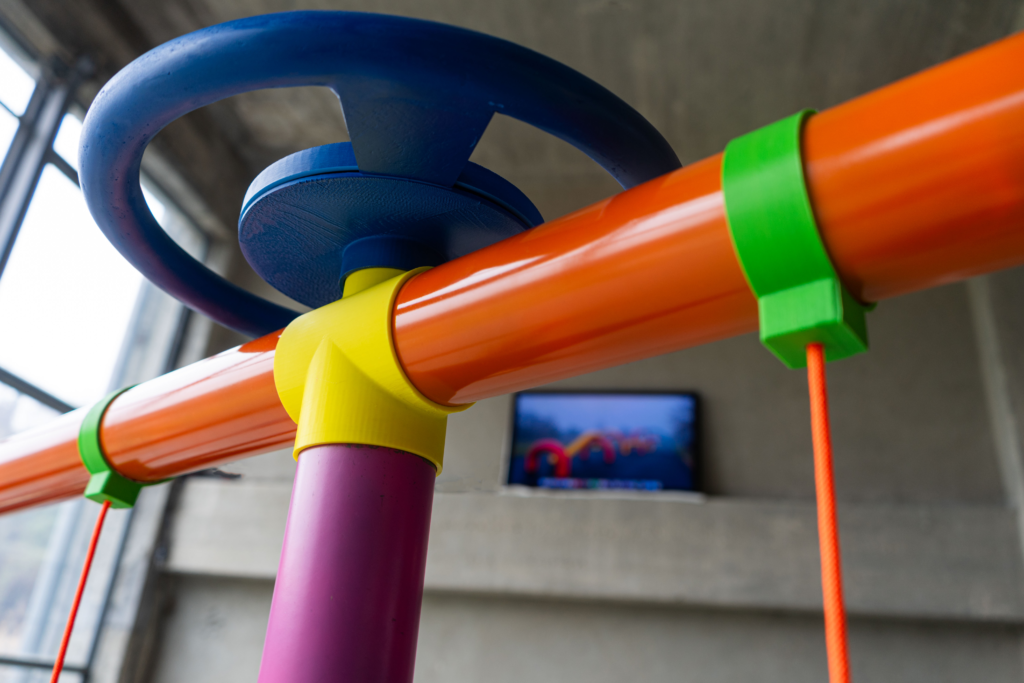
Tubi is a playful installation that delves into the boundary between reality and fiction through a colourful interactive playground structure inspired by AI-generated images of bizarre playground designs.
Visitors engage with the structure by playing with it, and the component’s movements trigger sounds or dynamic changes in the images displayed on a screen or projection. When the physical structure aligns with its digital counterpart, the distinction between the real and the unreal becomes unclear, prompting visitors to question the nature of reality, evoking a sense of the ethereal.
Selected images

Concept
Where can human creativity take us? What are its limits and how can we go beyond them?
In an era where artificial intelligence is getting more and more into our lives and daily tasks, our installation invites visitors to step into the blurred boundary between reality and fiction – a space where AI seamlessly blends in, challenging our perception of what is possible.
As you engage with our AI-inspired playground structure, we would like to transport you through a story and a series of dreamlike playgrounds – places that might exist, or perhaps only could exist. Each interaction triggers cheerful, playful sounds, reinforcing the sense of wonder and exploration, taking out the inner child that is inside of everyone of us.
But beyond the fun, a question lingers – where does human imagination end, and where does artificial intelligence begin? Are we the designers, or are we simply navigating a reality that AI is helping to create?
The archive
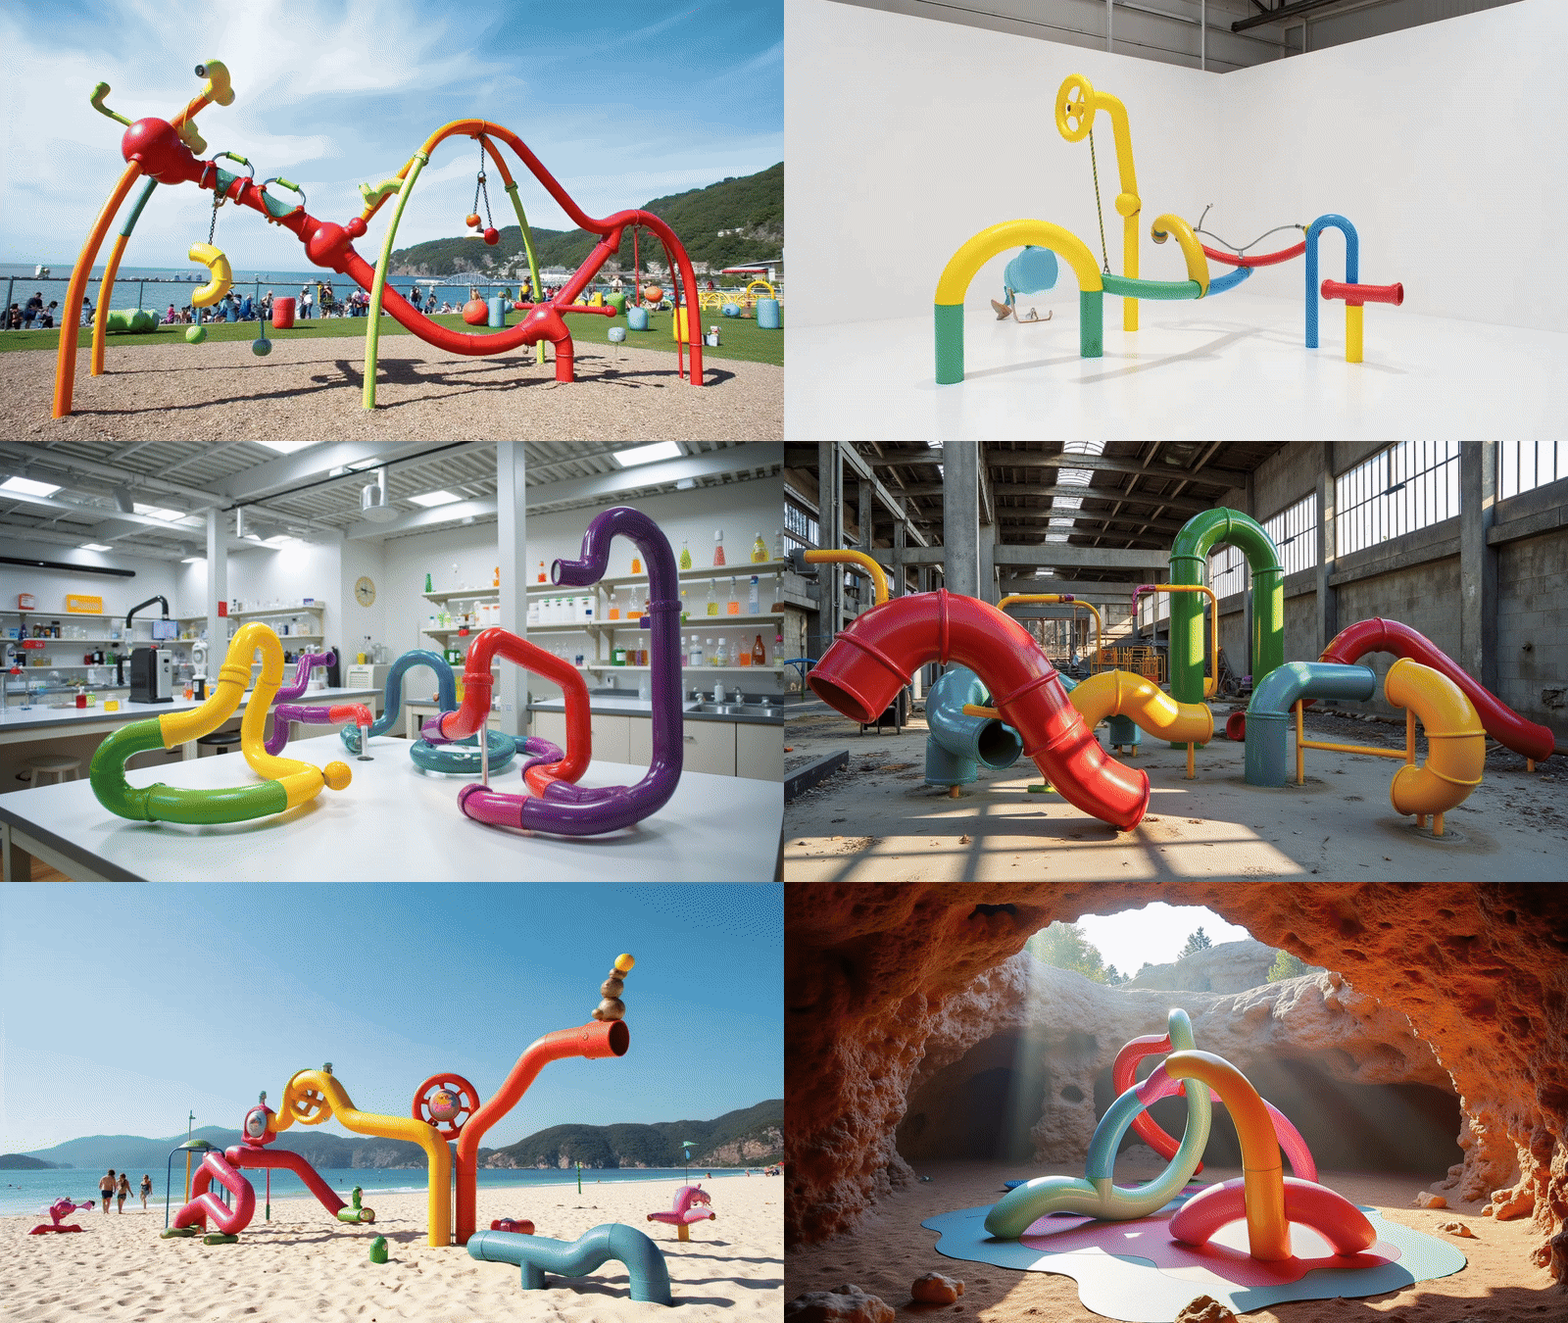
Archive - bizarre playground structures around the world
Fiction story behind the archive

Inspiration image
Hiroshi Tanaka was forty-two, stuck in a life that felt too small for him. Every morning, he squeezed into a packed train, spent hours in the office, and drowned in spreadsheets that no longer meant anything. His job, once tolerable, had turned into an endless loop of meetings, deadlines, and reports no one really cared about. The passion he once had was long gone, and replaced by exhaustion.
One lunch break, he found himself in a small park near the office. Children ran, laughed, climbed on everything in sight. Hiroshi watched them for a moment, and he thought of his own childhood – of how much he had loved playgrounds, climbing, sliding, losing himself in imagined adventures. When did that excitement disappear?
Almost without thinking, he walked over to a very colourful seesaw structure and climbed up. He lay down and slowly, his eyes closed.
When he woke up, the park was quieter, the sun lower in the sky. And yet, something inside him had shifted – like a long-stuck gear finally turning again. He couldn’t keep living like this.
As a young man, he had dreamed of designing play spaces, places where children could run, explore, and dream. But life had taken him elsewhere. Why? Why not try? Why not chase that feeling again?
That evening, he made the boldest decision of his life: a year off. No office, no deadlines. He would travel, seek out the world’s most beautiful and imaginative playgrounds, photograph them, study their designs. And maybe, just maybe, he would build something of his own.
With a mix of fear and excitement, he booked his first flight. The adventure was about to begin.
Design and prototyping process
Research
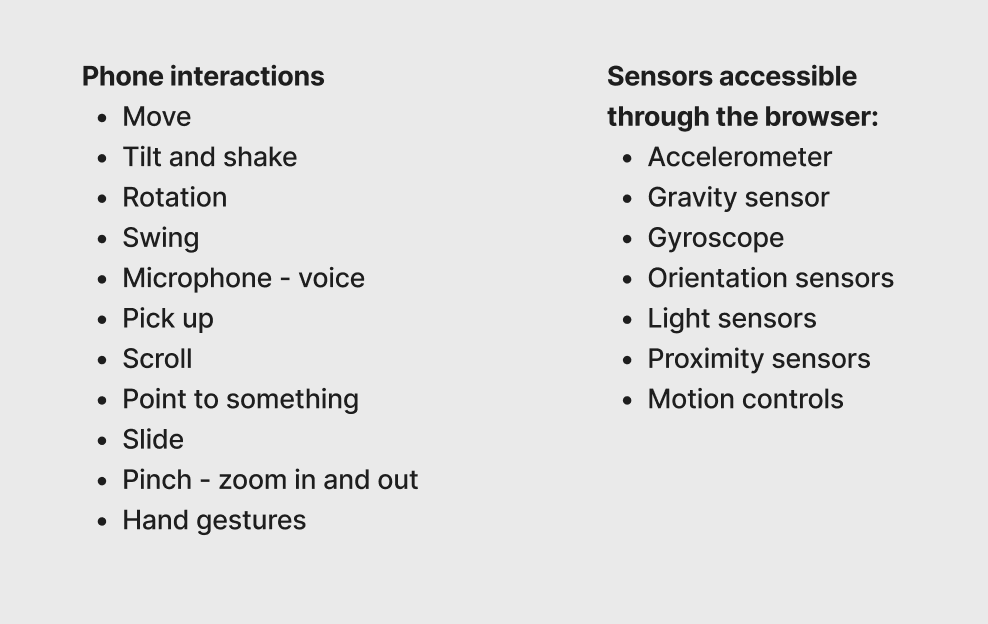
Our design process started with a research to understand which interactions we can have with a smartphone and which sensors can we access through the browser. This helped us gain an idea of all the different interactions we could implement into our projects.
Case studies and exhibitions
During the research phase, we explored a diverse range of interesting case studies and exhibitions that could serve as valuable references and sources of inspiration for our installation. Our focus was particularly on intriguing shapes and engaging, playful interactions that enhance user experience.
Additionally, we examined how material choices, spatial arrangements, and sensory elements – such as light and sound – can contribute to a more immersive and dynamic interaction, making the installation not just visually appealing but also experientially rich.
‘Myco’ by Jen Lewin Studio, 2024 - interactive installation inspired by mushrooms that come to life at night. Having the interactive sound and light technology combine to play and manipulate both wavelengths together. To play “Myco” users must actively touch the mushrooms.
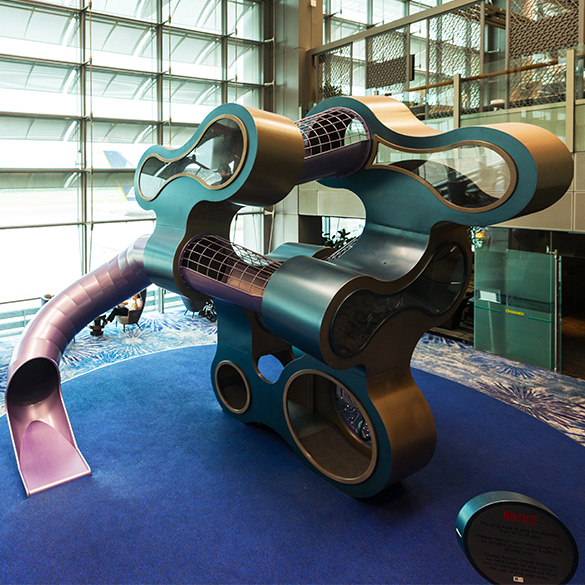
Play sculpture at Singapore's Changi airport by Carve Studio

'Billie Holiday Playground' by Carve Studio
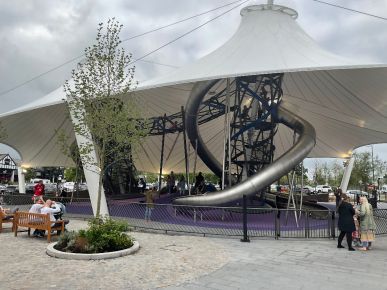
'Design Outlet Cheshire Oaks' by Carve Studio
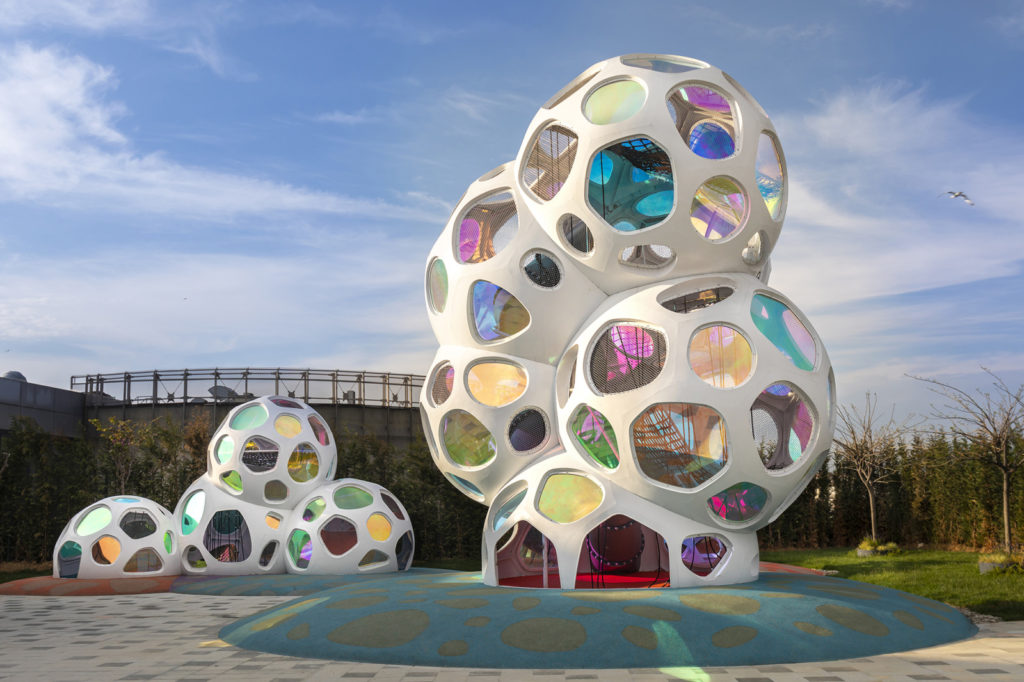
'Cloud Playground' by Carve Studio
Idea generation
We began our idea generation by exploring the available options on the market and brainstorming how we could design a playground structure. We considered three different approaches, each involving customisation to fit our needs while integrating and hiding the technical aspects of the interactions.

Option 1

Option 2
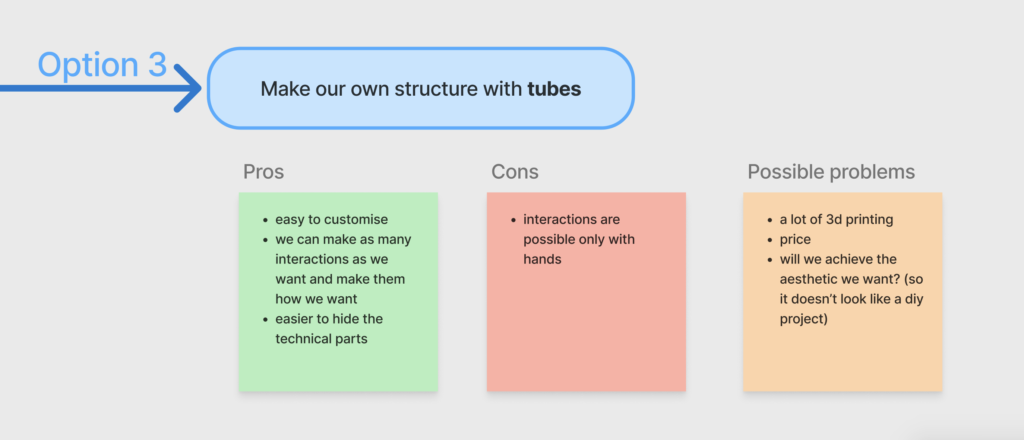
Option 3
After evaluating all the options and weighing the pros and cons, we decided that designing our own structure using water pipes would give us more creative freedom and allow for more engaging interactions.
First sketches
After generating ideas, we began sketching a prototype structure, drawing inspiration from case studies and AI-generated images. This process led us to two distinct options, each featuring different interactions and ways to play.
Then, we created a quick render to visualize how the designs would look with colors and patterns.

Option 1 - sketch
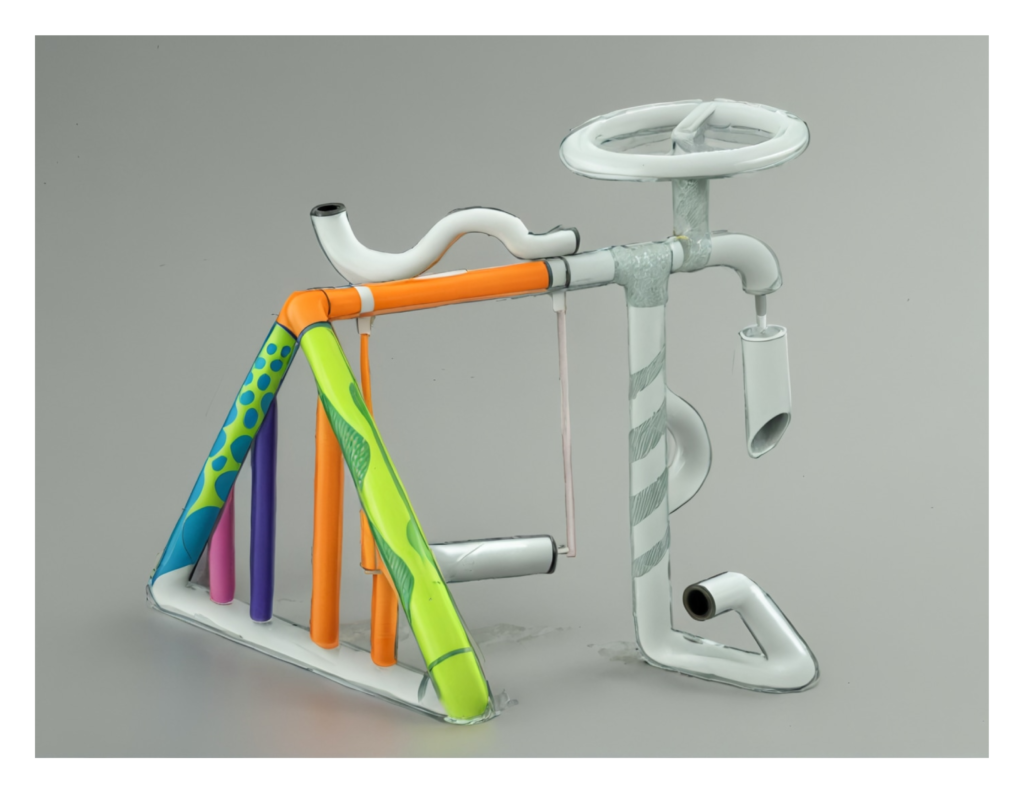
Option 1 - AI generated render example
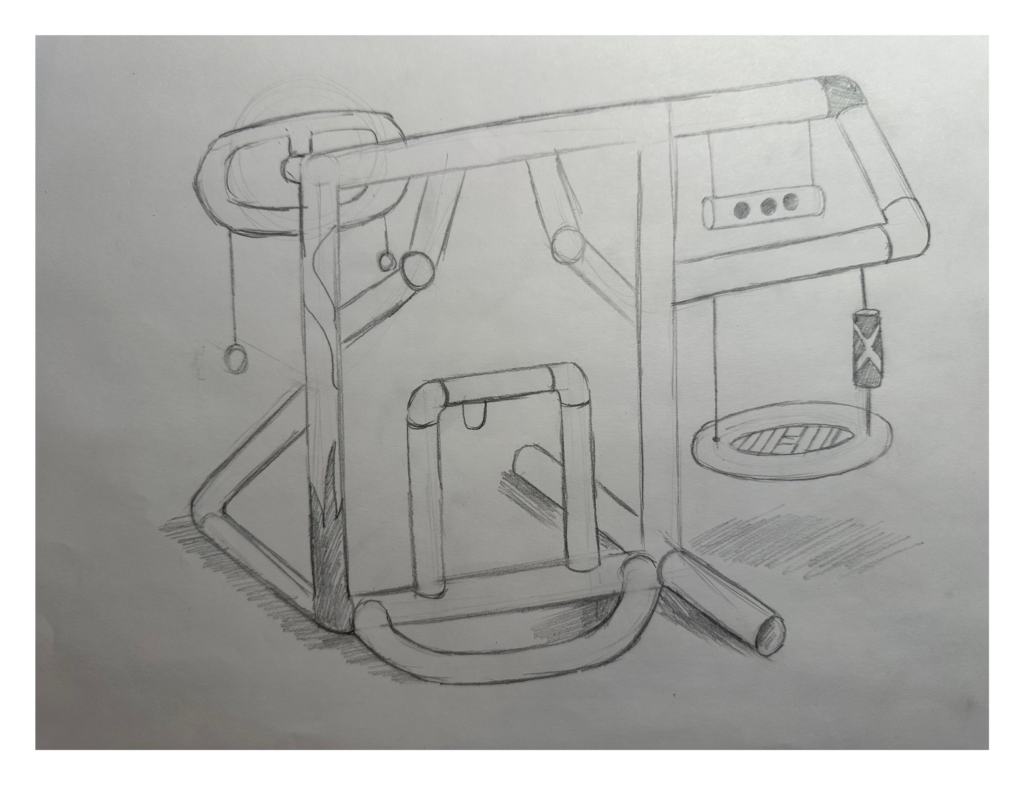
Option 2 - sketch
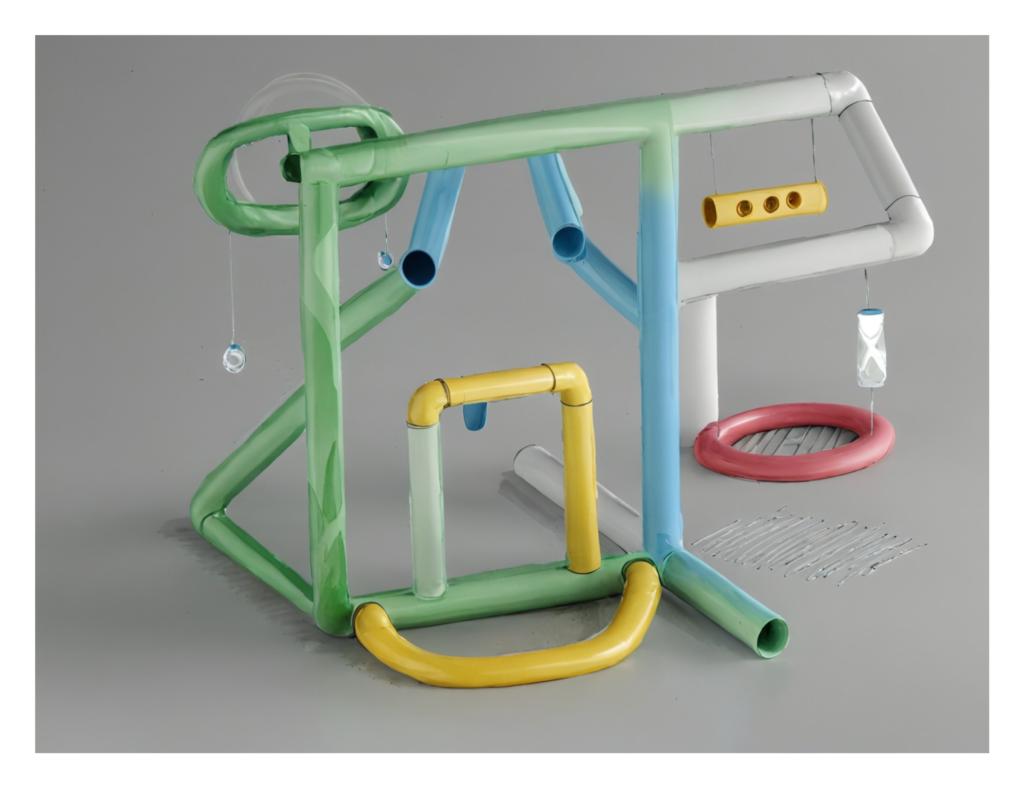
Option 2 - AI generated render example
Final idea
By reviewing all the ideas and comparing them to our desired interactions, we selected our final design. We then created a table detailing each interaction and the corresponding sensor and user feedback.
Final sketch
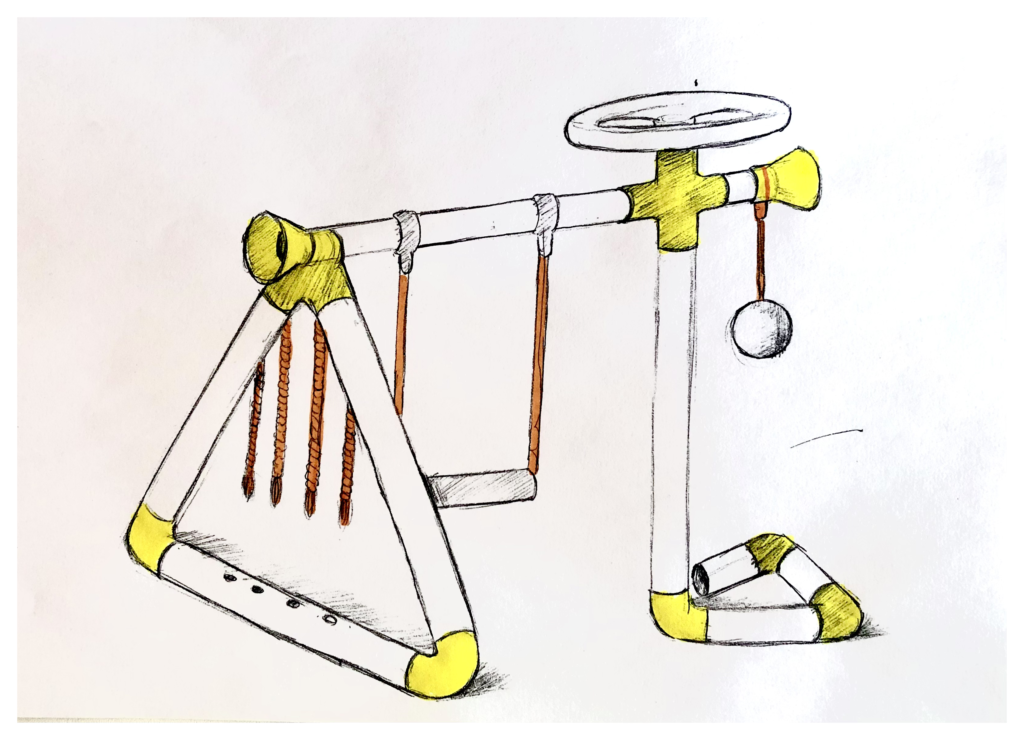
Final sketch of the structure
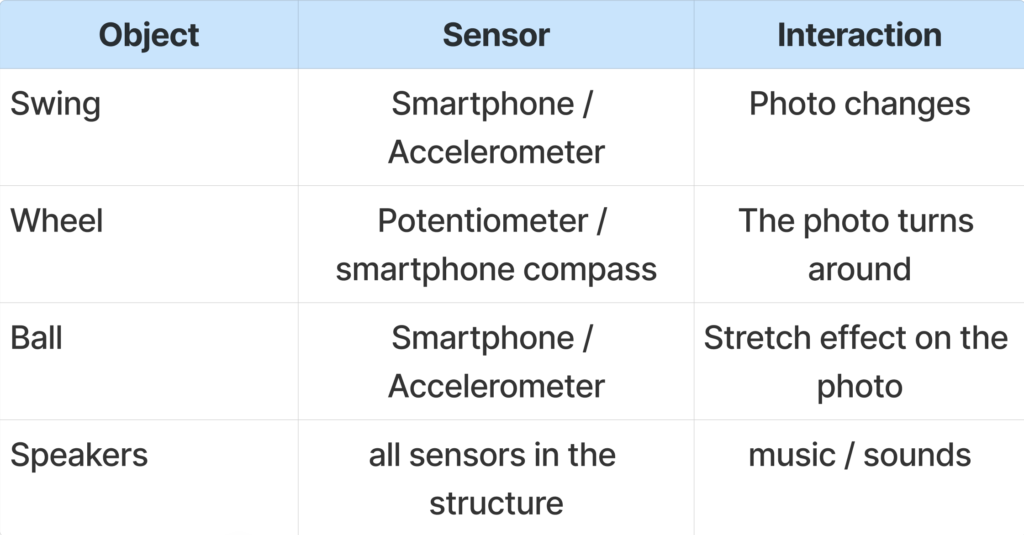
Interactions, sensors and feedback
3D modeling
Before beginning the construction of the structure we had envisioned and sketched, we first created a detailed 3D model in Fusion360, ensuring it matched the precise dimensions we had planned. This allowed us to visualize the design more clearly and make any necessary adjustments before moving forward with the physical construction.
Then, we created a render to visualize how the structure would look with the chosen color palette.
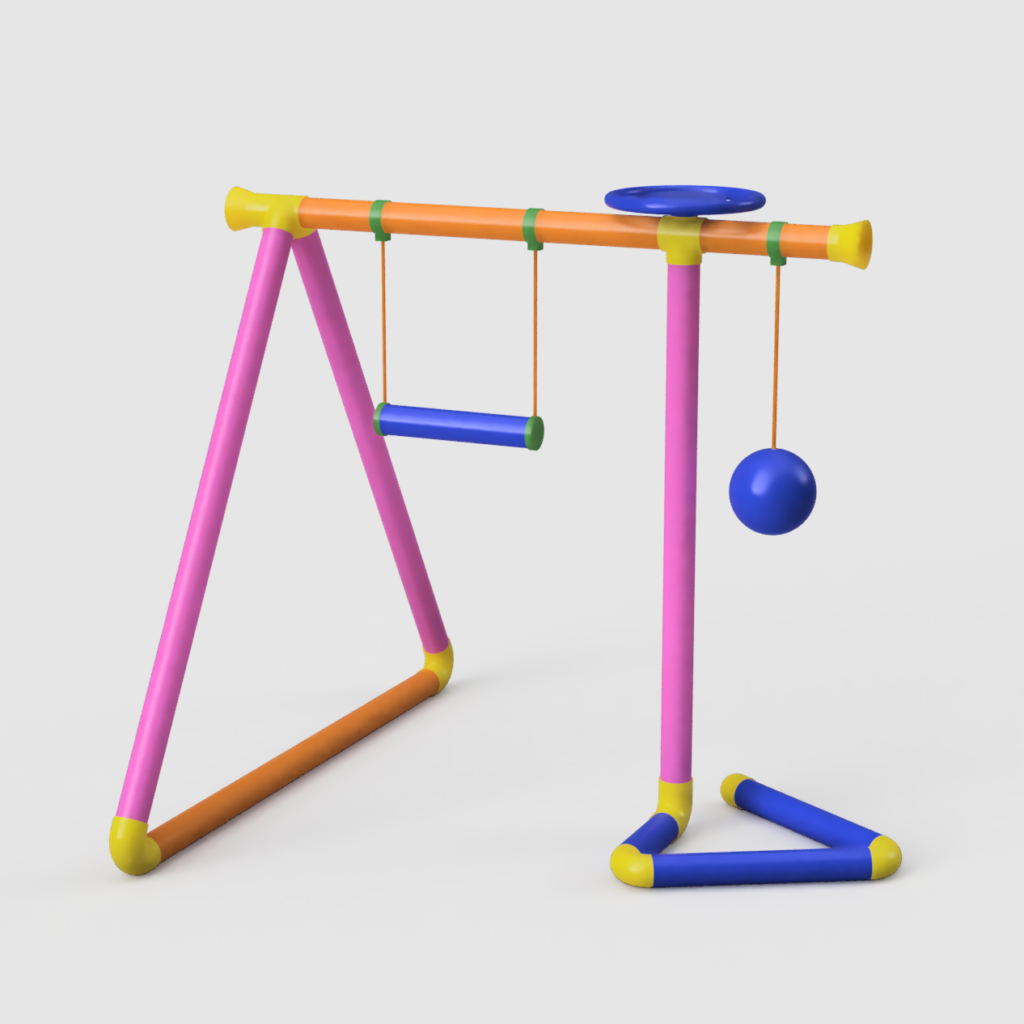
Render in Fusion360
Construction process
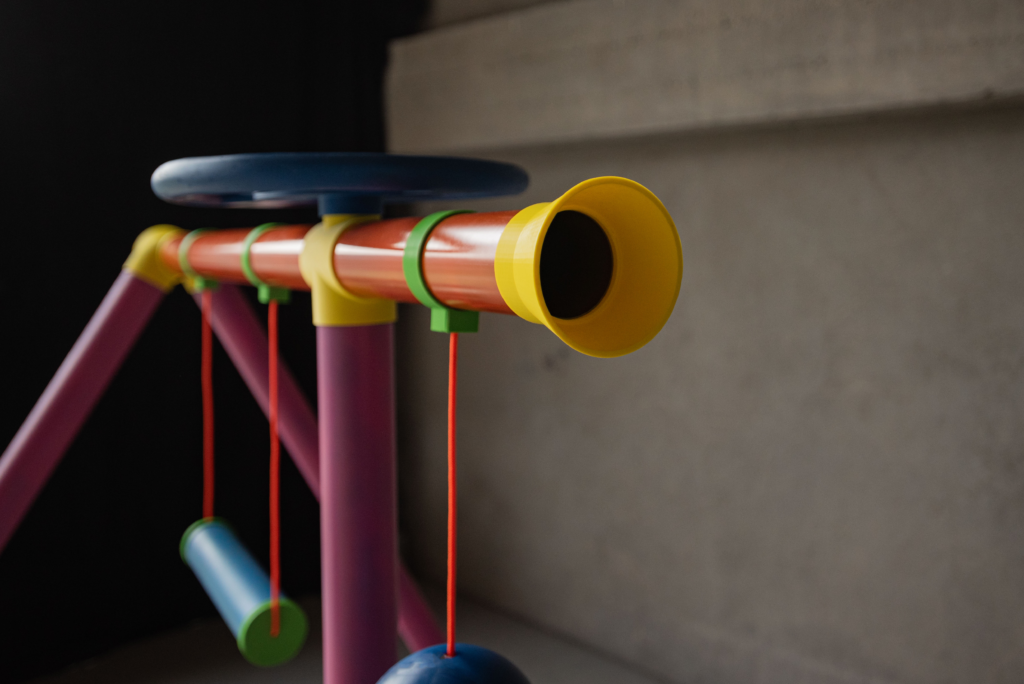
Due to the unattractive shape of the tube ends we purchased, we decided to cut them and 3D print all the joints to connect the different tubes. This not only improved the overall appearance but also gave us greater flexibility in designing the shapes and angles we needed.
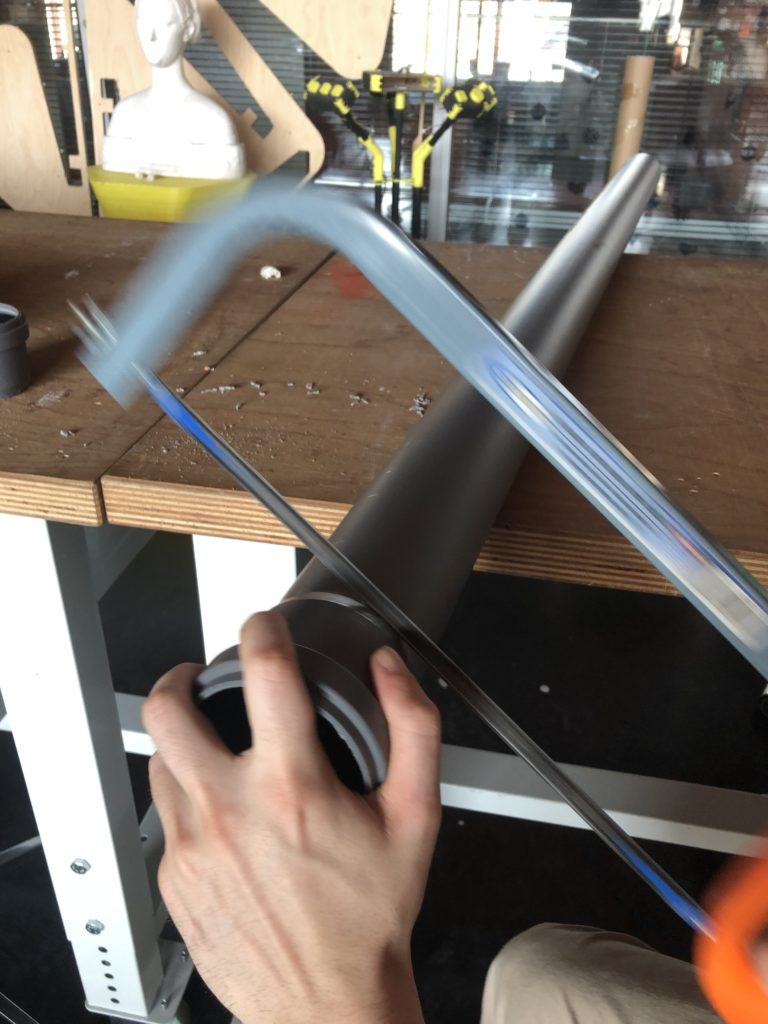
Cutting the tubes

Spray painting the tubes
Additionally, the final caps and the wheel were also 3D printed to keep everything visually consistent.

3D printed parts
Since we aimed to create a playful structure that could “magically” transform the images while being interacted with, our focus was on concealing all the technology required for its functionality.
After experimenting with Arduino boards and various sensors, such as accelerometers and ultrasonic distance sensors, we ultimately chose to use smartphones as sensors. This decision not only simplified the process – eliminating the need for cables – but also made it easier and faster to hide the technology and disassemble the structure when needed.
Swing phone support: we designed the support in two separate parts, kept stable by the rope used to attach the swing to the upper tube of the structure.

Structure inside the swing tube to hide the smartphone
Steering wheel: for this moving component, we designed it in 6 separate parts to fit within the 3D printer’s size limitations and to create a cover for the smartphone that could be quickly assembled and disassembled.
We were not satisfied with how the joints between the different parts looked, and the surface did not provide a pleasant haptic experience. Because of this, we decided to apply putty to the entire wheel to create a smoother surface and conceal the joint lines.
Afterward, we sprayed it with blue paint for a clean, finished look.
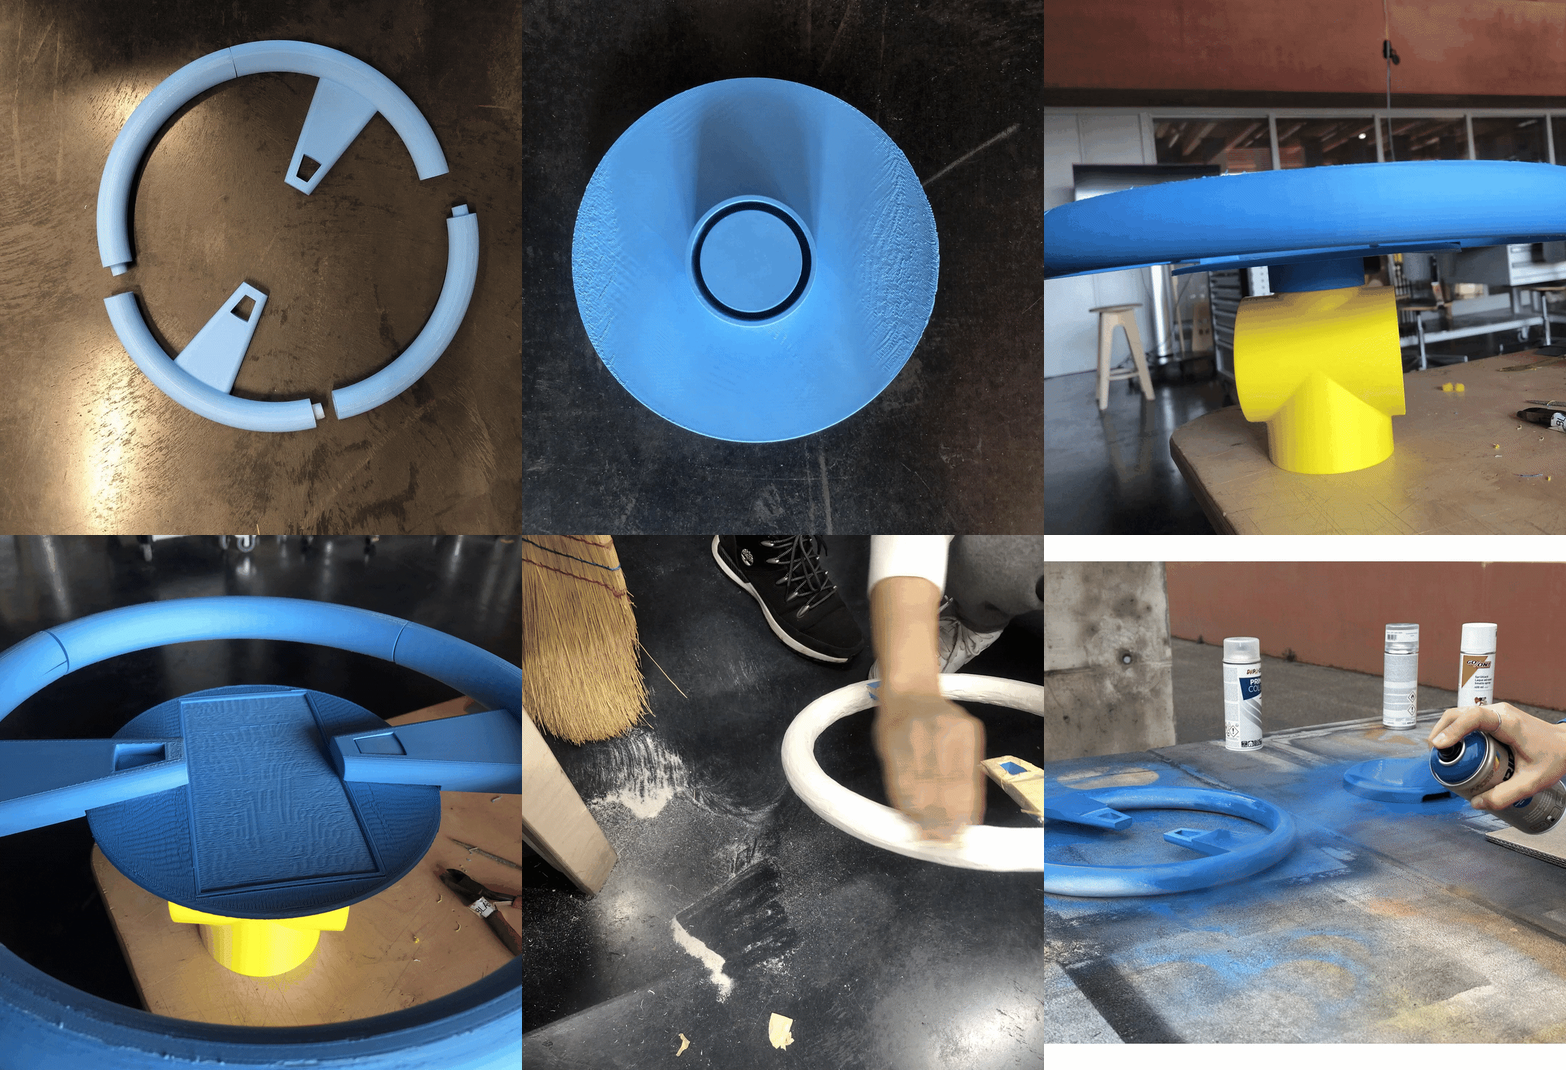
Wheel refinement
Ball: after testing a 3D-printed support, we realized that the rounded shape made it difficult to keep the smartphone stable and possible to assemble. In the end, we found a creative solution by using bubble wrap, which proved to be highly effective in providing both stability and easy disassembly.

Spray painting the clear plastic ball
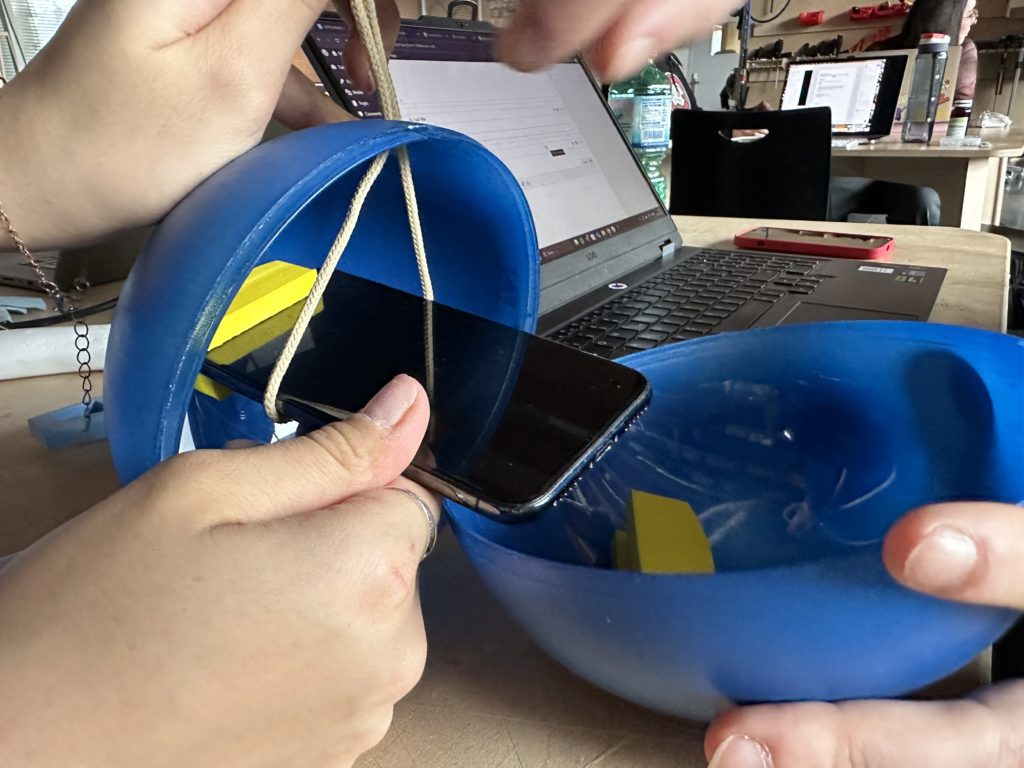
Phone support test 1
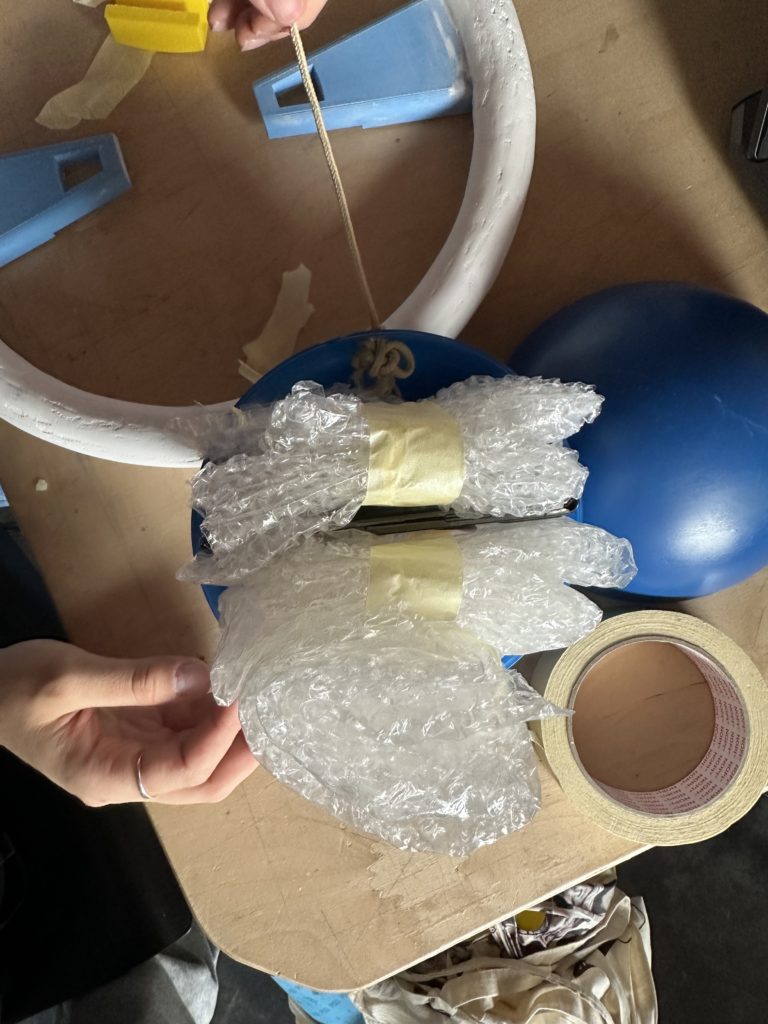
Final solution for securing the phone inside of the ball
First assembly
After 3D printing most of the components and cutting all the tubes, we made a very first assembly to check the structure’s stability and to see how the overall structure would look like.

First assembly - work in progress
The structure initially lacked complete stability, which led us to experiment with different solutions to enhance its balance. One of the most effective approaches we tested was placing additional weights inside the bottom tubes, with a particular focus on the blue one on the right. This adjustment significantly improved the overall stability of the structure, making it more secure and reliable. As a result, the user experience was greatly enhanced, not only for individuals using it alone but especially for scenarios involving multiple users.
Final outcome
The final structure is composed of:
- – 6x polypropylene tubes (1.5m long), one of which is cut into 4 parts
- – 8x 3D-printed joints
- – 2x 3D-printed speaker-shaped components
- – 3x 3D-printed component attachments (2 for the swing, 1 for the ball)
- – 2x 3D-printed swing tube closures
- – 2x smartphone supports inside the swing
- – 1x steering wheel, divided into three parts: main body, bottom part and upper part
- – 1x plastic ball, split in two halves
- – 2m of colored rope
- – bubble wrap
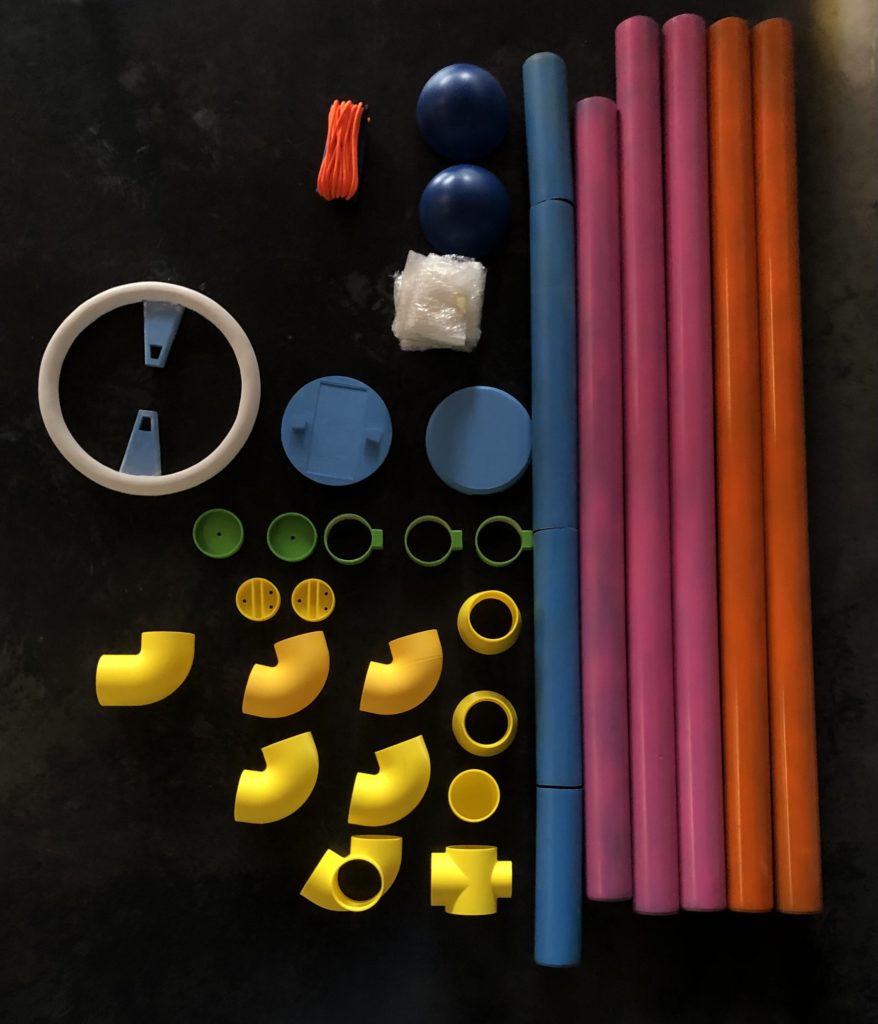
Inventory - all parts of the structure
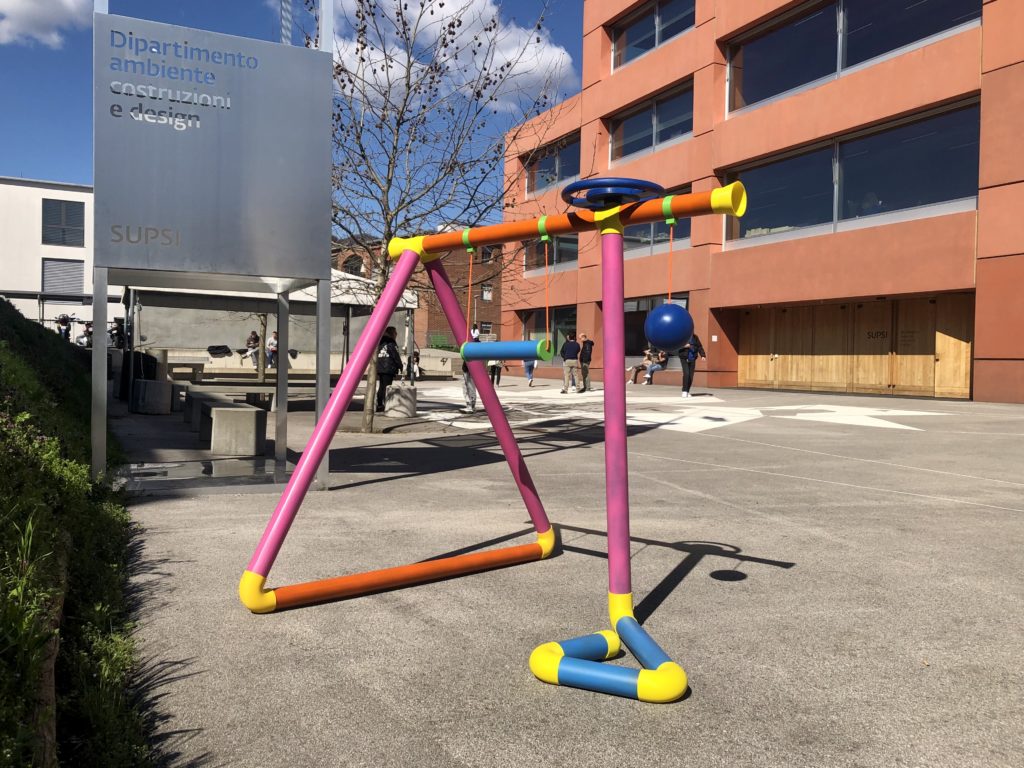
Structure outside SUPSI
Dataset selection of images
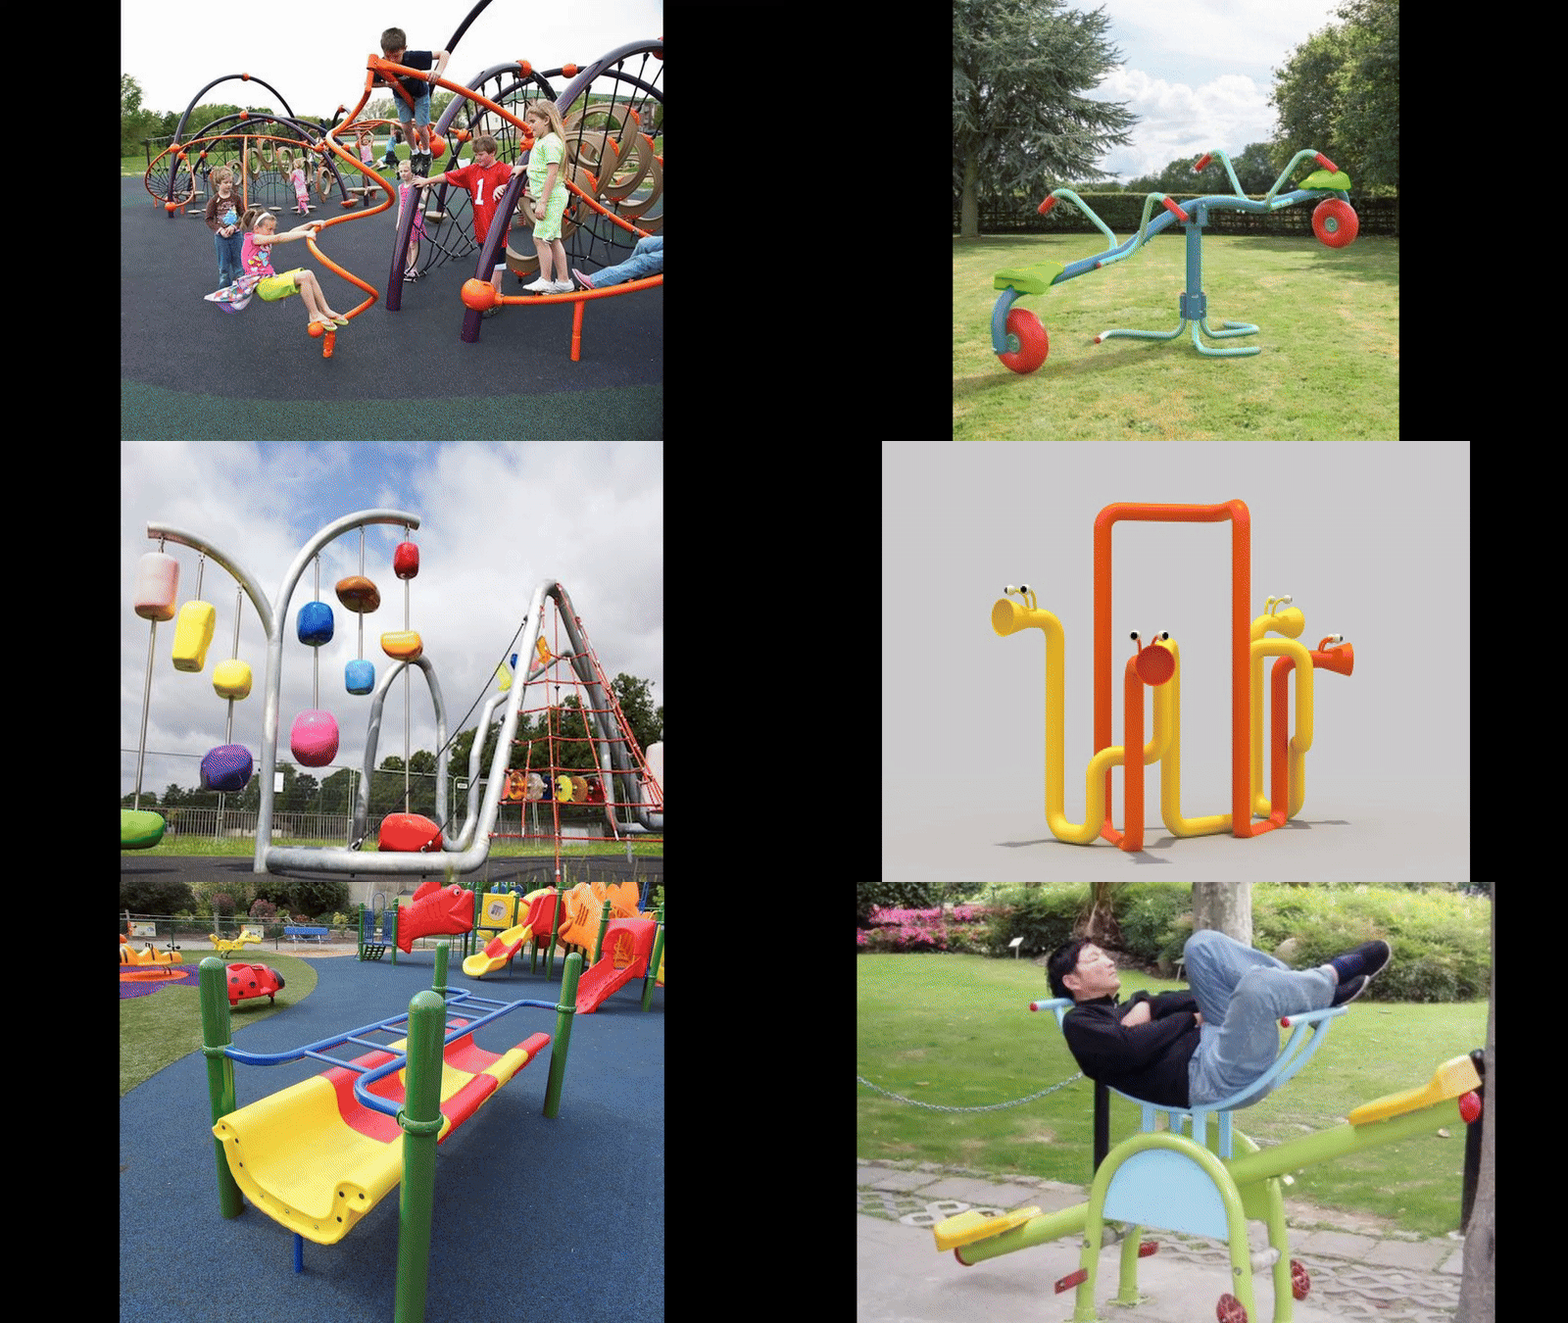
Short selection of images used to train the model
To create diverse environments and capture different moods, we added an indication in the prompt to place the structures in various settings, spanning different seasons and countries. This approach reflected the journey of our fictional character, immersing the viewer in his adventure.
Prompt: “Create an image of a colorful playground structure with tube shapes, in the style of @TOKPLAYGROUND. The image must be realistic, yet the structure should have a very bizarre shape. No people should be present. The structure is located …”
From the AI-generated images, we selected those that struck a balance between realism and surrealism – maintaining lifelike qualities while showcasing bizarre shapes, striking colors and unconventional placements.
The final archive consists of 78 images, a selection of which is presented below.
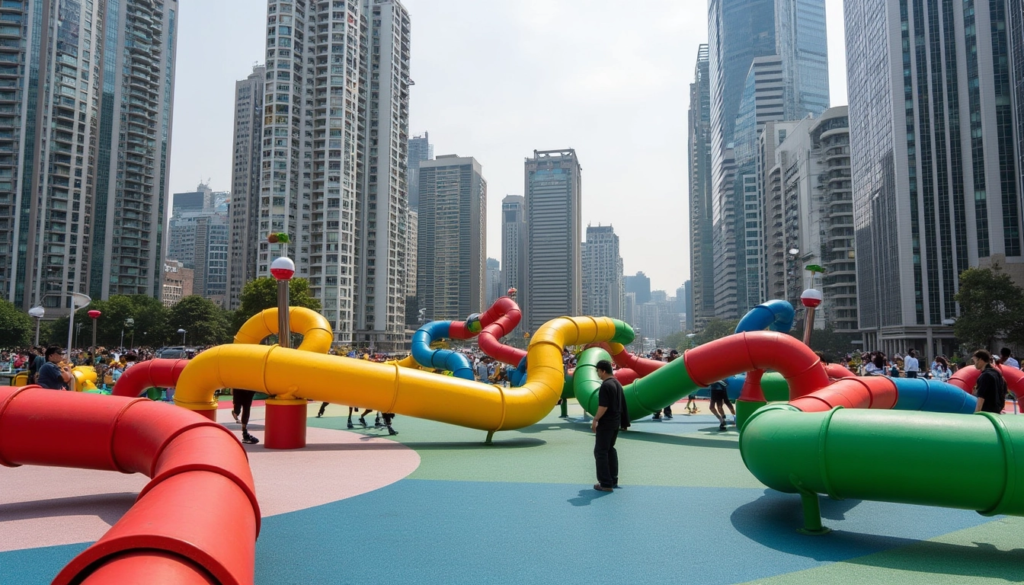
Shangai, China

Madeira, Portugal
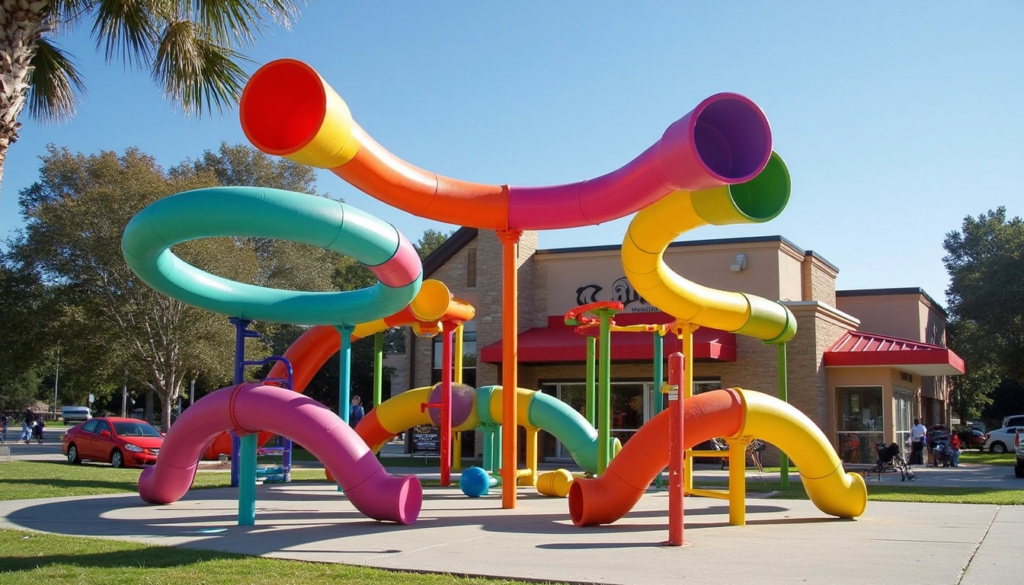
San Diego, USA. American fast food
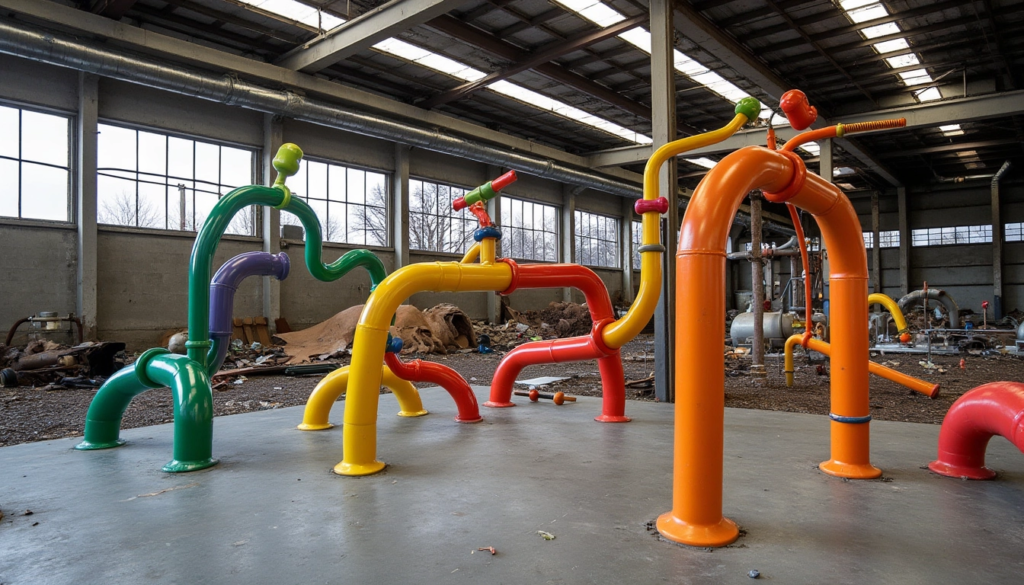
Abandoned factory
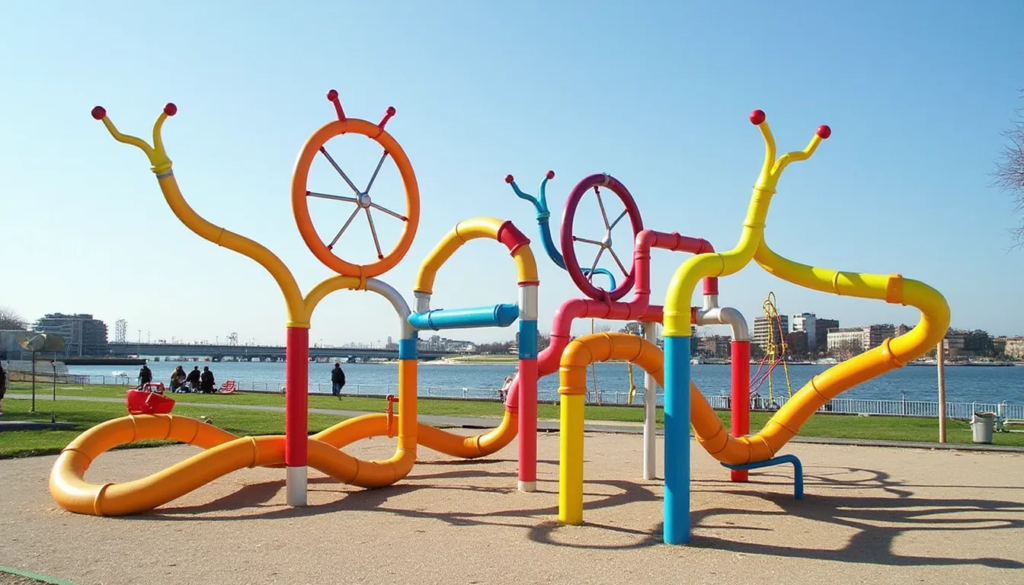
Miami, USA. Seaside
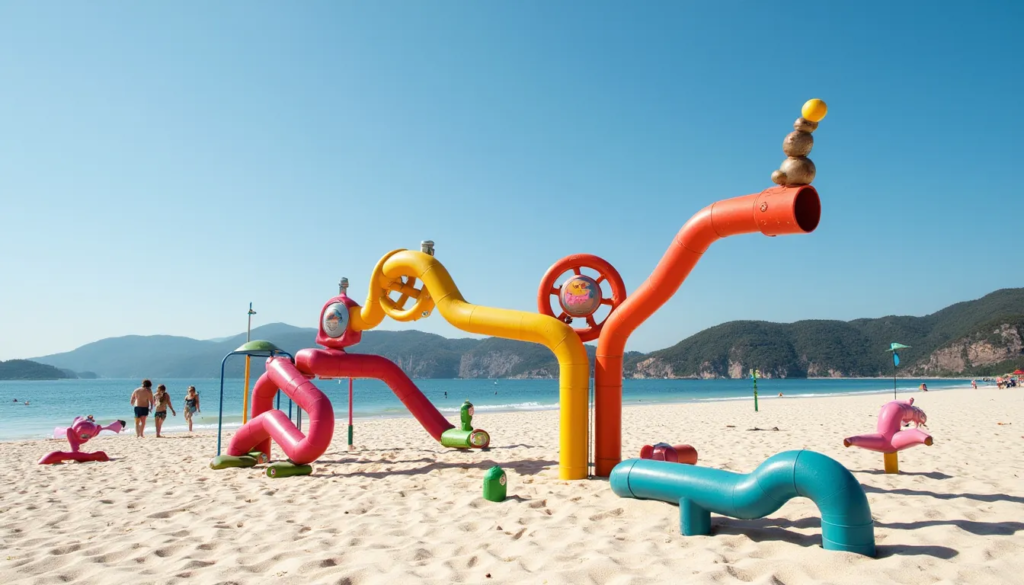
Rio de Janeiro, Brazil. Playground on the beach
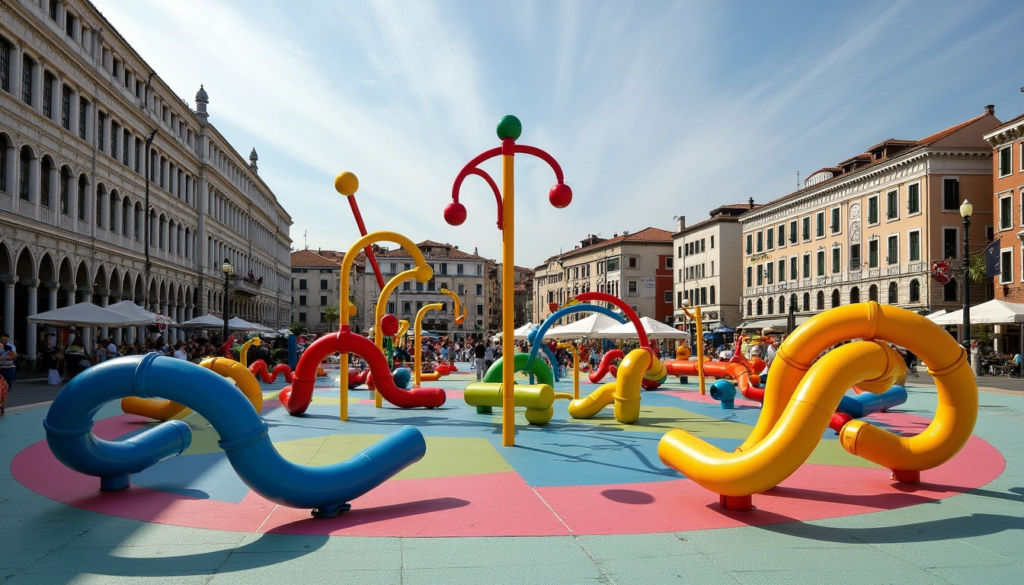
Venice, Italy. City centre
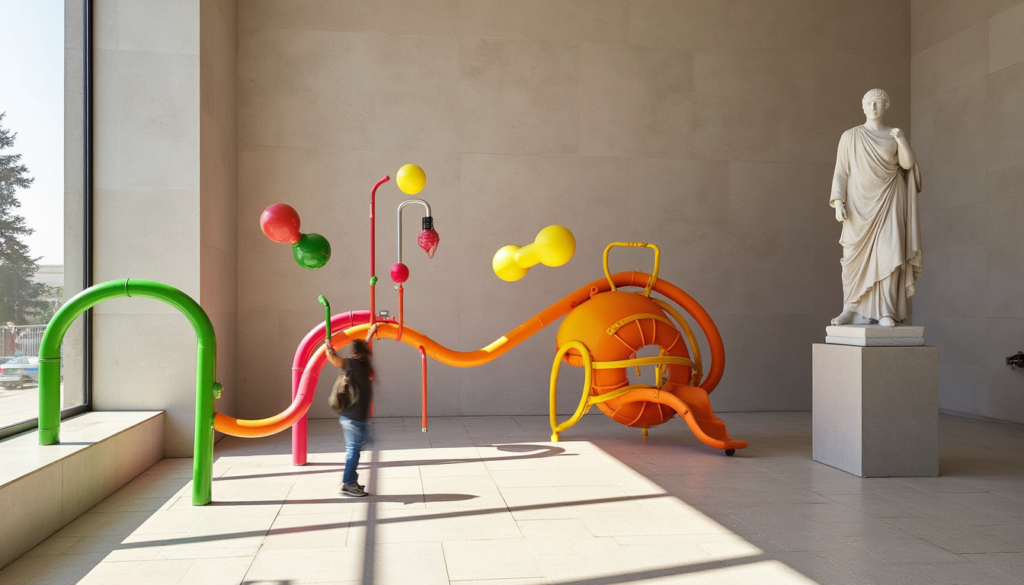
Rome, Italy. History museum
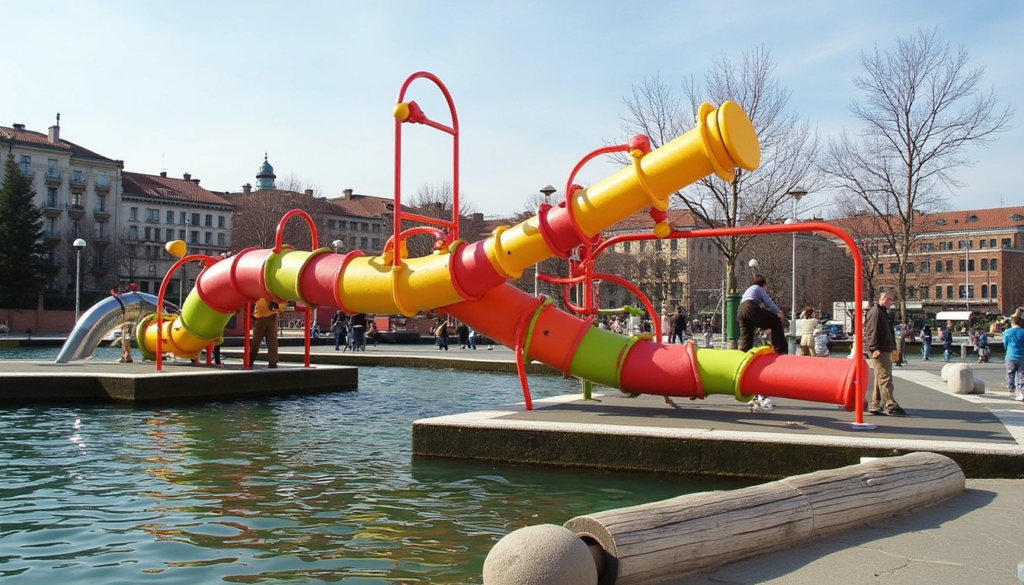
Lausanne, Switzerland
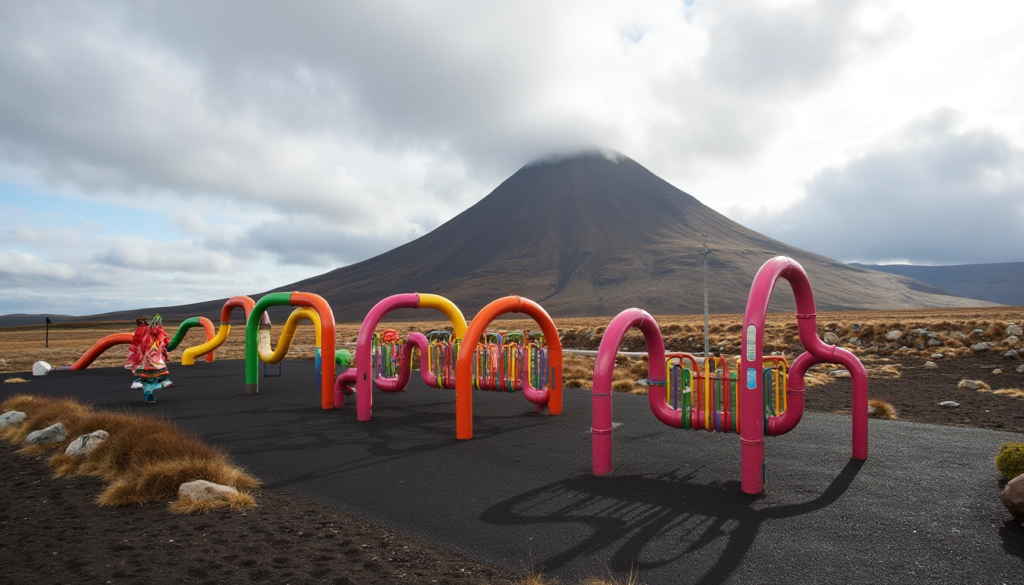
Iceland
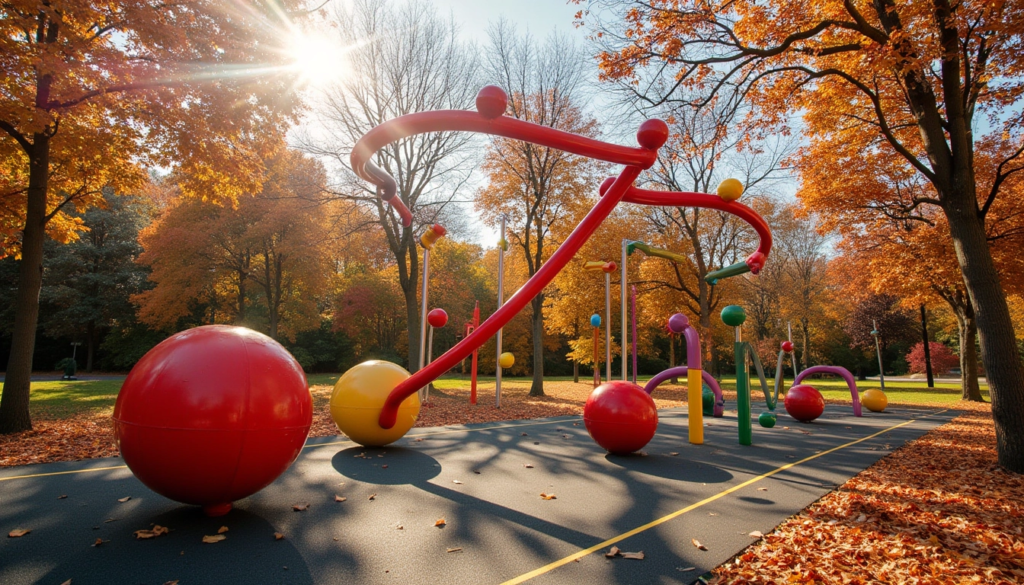
Lille, France. Autumn
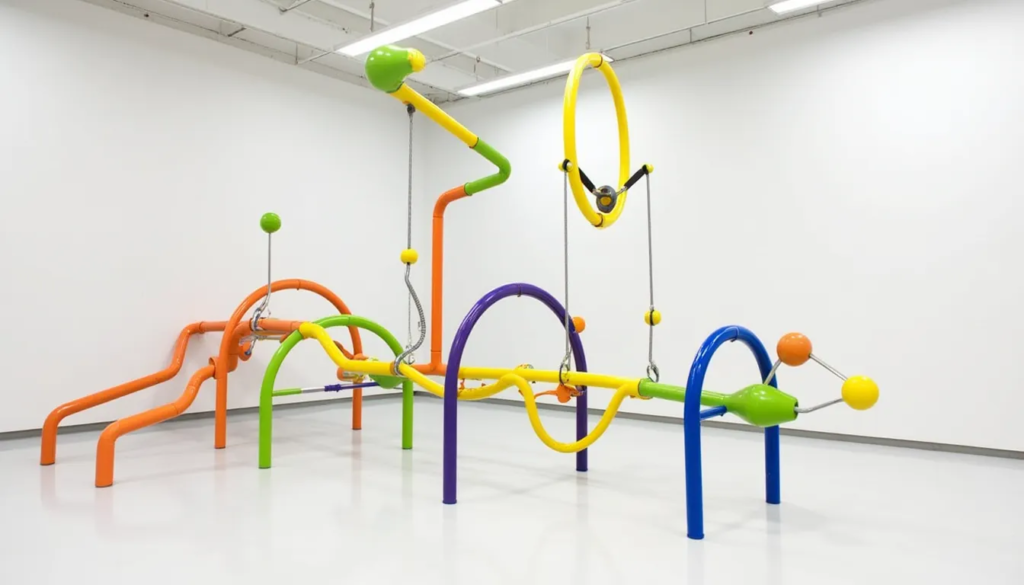
Contemporary Art Exhibition
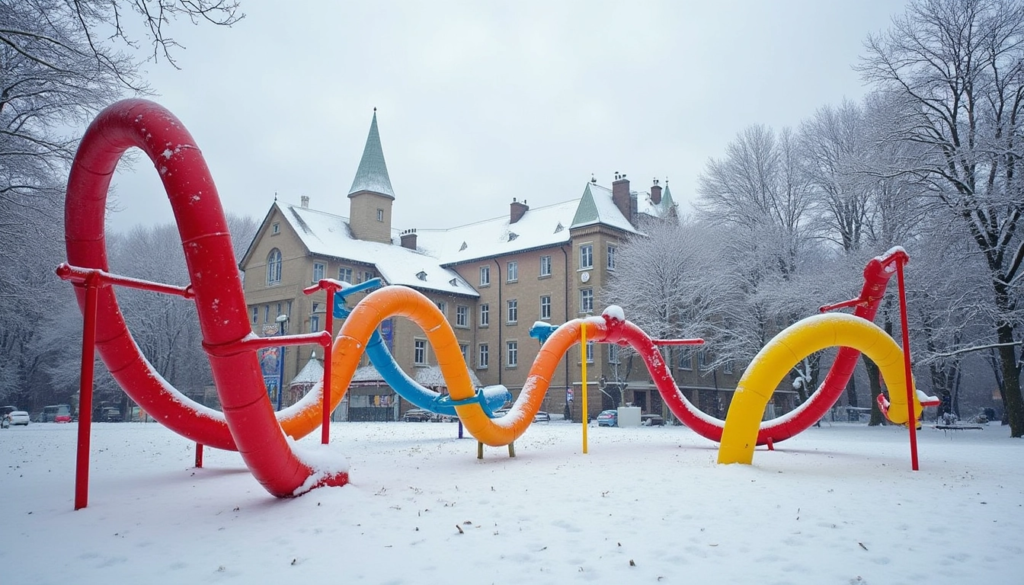
Cambridge, UK
The interactions
When considering interactions, we explored how the objects we designed could influence our image archive. Aiming for coherence between structure and the resulting effects, we envisioned playful interactions that would generate amusing sounds and dynamic simple yet funny visual effects.
4 interactions were designed:
- – Swing: by moving the swing by hands the visitors can change the image displayed on the wall.
- – Steering wheel: by rotating the wheel the visitors can rotate the image by 360 degrees
- – Ball: by moving the ball in whatever direction on the X and Y axis visitors generate a stretch effect on the image displayed. More in detail: movements on the X axis stretch the image horizontally, movements on the Y axis stretch the image vertically.
- – Speakers: the first reaction we and others had when approaching the tubes inspired us to create a simple yet powerful and playful interaction: speaking into the tube. The voice change caused by the tube (due to resonance, reverberation, frequency filtering and directivity) creates a funny and engaging effect, which we chose to keep entirely analog.
Sounds selection
Since we designed a playful and colorful structure, our main concern regarding sound was to select fun and engaging audio elements that remained enjoyable without becoming too disruptive for visitors.
For the rotating wheel, we drew inspiration from the sound of Boomwhackers – colorful, lightweight plastic tubes that produce distinct musical pitches when struck, and known for their simplicity and accessibility.
The sounds produced by this instrument were playful, and its shape and colors perfectly matched the theme of our tube-like structure.
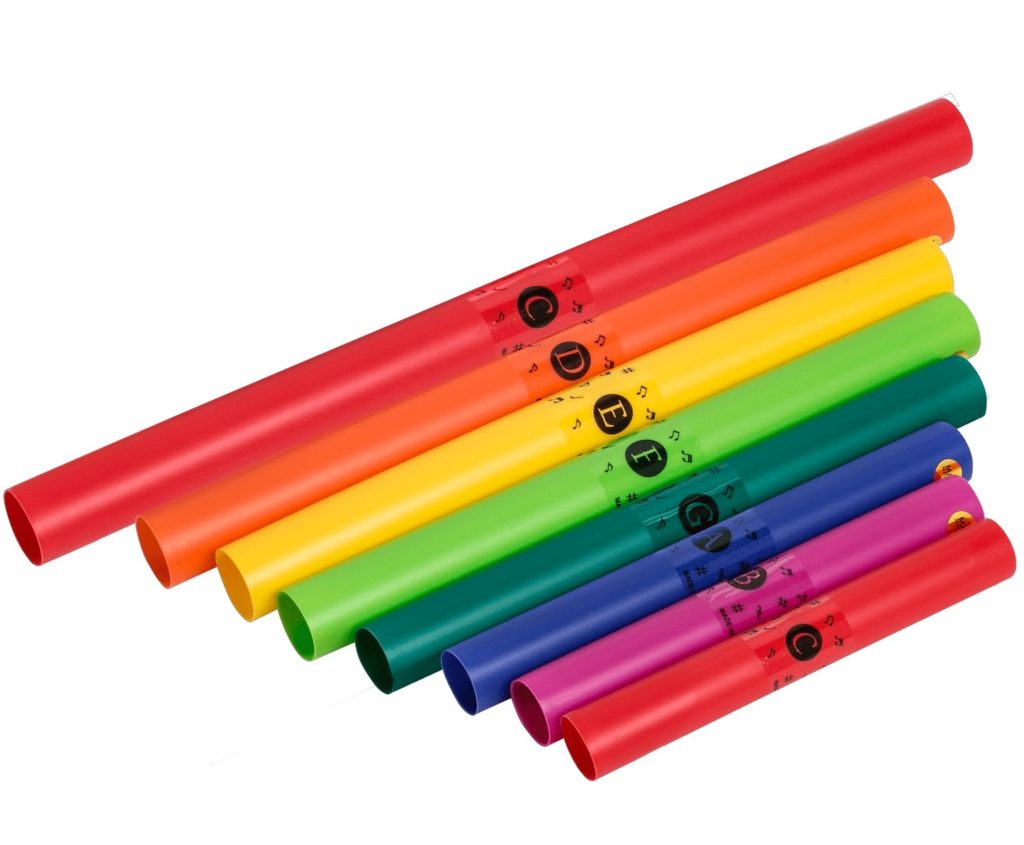
Boomwhackers
Steering wheel sound - plays only when the wheel is rotating
Code
The projection system of the installation dynamically changes images and audio based on smartphone sensor data. It uses WebSockets to receive motion data and updates the projected visuals in real time.
Requirements:
- x1 PC running Websocket
- x3 smartphones
- WiFi for data transfer
- Create local signatures for https
Key Interactions
For the interactions we used iPhones as controllers:
- iPhone 1: fast motion switches images
- iPhone 2: device tilt controls scaling
- iPhone 3: device rotation adjusts image rotation and triggers sound effects
AI-Generated Image Projection
- Images displayed on fullscreen canvas
- Real-time rotation, scaling, and transitions
Interactive Audio
- Background music plays when scaling
- Futuristic effect (low_futuristic.mp3) plays when moving
- Rotation sound (swing.mp3) plays when switching images
Smart UI Controls
- WebSocket connection status displayed in a floating header
- Header appears on mouse hover
File Structure
- index.html   #Main webpage with Canvas and WebSocket logic

- script.js    #JavaScript for interaction and WebSocket handling

- src/

- aiX.png  #AI-generated images

- 1.mp3    #Rotation sound

- swing.mp3 #Image switch sound

- low_futuristic.mp3 #Futuristic sound effect

- iphone.html #iPhone sensor data collecting
WebSocket Connection: each iPhone controls a different aspect of the projection
const ws = new WebSocket("wss://your-websocket-server");

ws.onmessage = (event) => {
    let data = JSON.parse(event.data);
    if (!data.device) return;
    processSensorData(data);
};
Swing - iPhone 1
case "iPhone1":
if ((Math.abs(data.acceleration.x) > 2 || Math.abs(data.acceleration.y) > 2) &&
    (Date.now() - lastImageSwitchTime > 1000)) {
    lastImageSwitchTime = Date.now();
    switchImage();
    needRedraw = true;
}
break;
Ball - iPhone 2
case "iPhone2":
scaleX += (1 + data.acceleration.x / 5 - scaleX) * 0.1;
scaleY += (1 + data.acceleration.y / 5 - scaleY) * 0.1;
let targetScale = globalScale + data.acceleration.z / 100;
globalScale += (Math.max(0.5, Math.min(2, targetScale)) - globalScale) * 0.1;

let motionThreshold = 0.3;
let isStationary =
    Math.abs(data.acceleration.x) < motionThreshold &&
    Math.abs(data.acceleration.y) < motionThreshold &&
    Math.abs(data.acceleration.z) < motionThreshold;
if (!isStationary) {
    lastMotionTime = Date.now();
    if (!isMoving) {
        isMoving = true;
        if (futuristicAudio.paused) {
            futuristicAudio.currentTime = 0;
            futuristicAudio.play().catch(e => console.error("futuristic music play failed:", e));
        }
    }
} else {
    if (isMoving && Date.now() - lastMotionTime > 200) {
        isMoving = false;
        futuristicAudio.pause();
        console.log("futuristic music pause");
    }
}
needRedraw = true;
break;
Steering wheel - iPhone 3
case "iPhone3":
let targetRotation = data.heading || 0;
let angleDiff = targetRotation - rotation;

// Handling 360° Angle Spanning
if (angleDiff > 180) {
    angleDiff -= 360; // Selecting the shortest path
} else if (angleDiff < -180) {
    angleDiff += 360; // Selecting the shortest path } rotation += angleDiff * 0.1; // smooth transition let rotationSpeed = Math.abs(targetRotation - lastRotation); lastRotation = targetRotation; if (rotationSpeed > 0.5) {
    if (!isRotating) {
        console.log("Start playing music");
        audio.play().catch(e => console.error("Music Playback Failure:", e));
        isRotating = true;
    }
    lastRotationTime = Date.now();
}

if (isRotating && Date.now() - lastRotationTime > 200) {
    console.log("Pause Music");
    audio.pause();
    isRotating = false;
}

needRedraw = true;
break;
Image draw function
// Unified control 'draw()'
function drawLoop() {
    let now = performance.now();
    if (needRedraw && now - lastDrawTime > minDrawInterval) {
        lastDrawTime = now;
        ctx.clearRect(0, 0, canvas.width, canvas.height);
        ctx.save();
        ctx.translate(posX, posY);
        ctx.rotate(-rotation * Math.PI / 180);
        ctx.scale(scaleX * globalScale, scaleY * globalScale);
        ctx.drawImage(image, -canvas.width / 2, -canvas.height / 2, canvas.width, canvas.height);
        ctx.restore();
        needRedraw = false;
    }
    requestAnimationFrame(drawLoop);
}
Prototyping - code testing
Swing interaction
Ball interaction
Wheel interaction
Installation
Space
The exhibition took place in March 2025 in the former Saceba Cement Factory.
Located in the Breggia Gorge Park in Morbio Inferiore, the former Saceba cement plant stands as a notable example of industrial archaeology in Switzerland. Established in the early 1960s, it played a key role in supplying cement for major public and private construction projects at both the cantonal and national levels. At the heart of the site is the Torre dei Forni, once the core of the plant’s operations, now repurposed as a venue for cultural events and artistic installations.
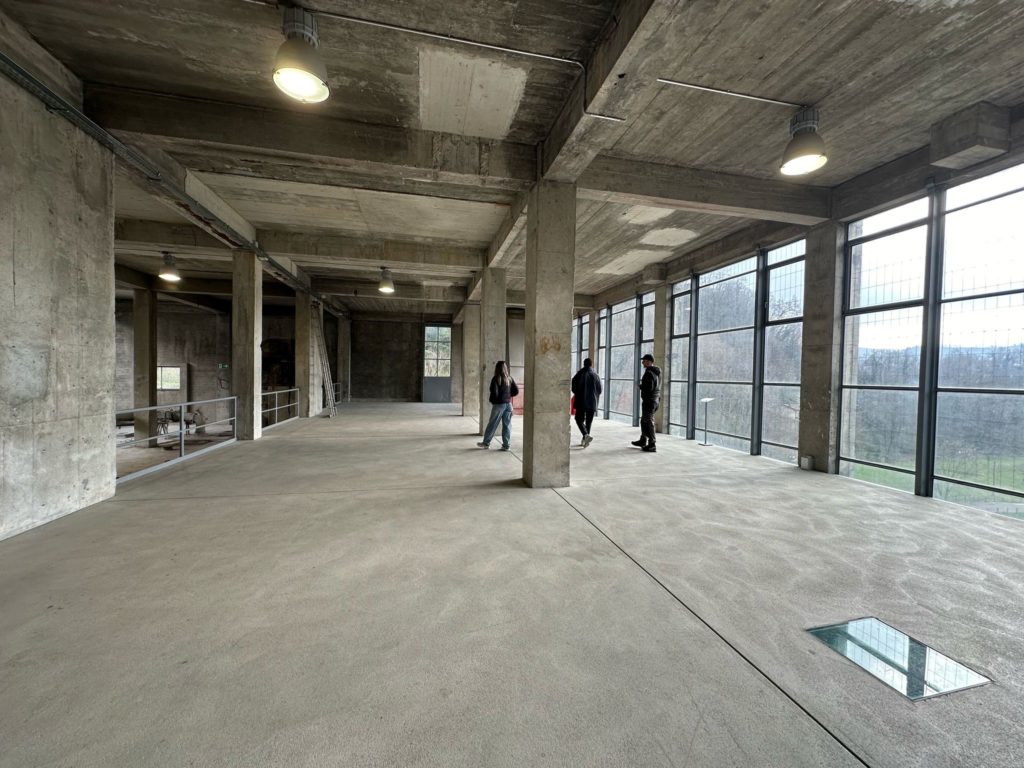
Saceba - 4th floor
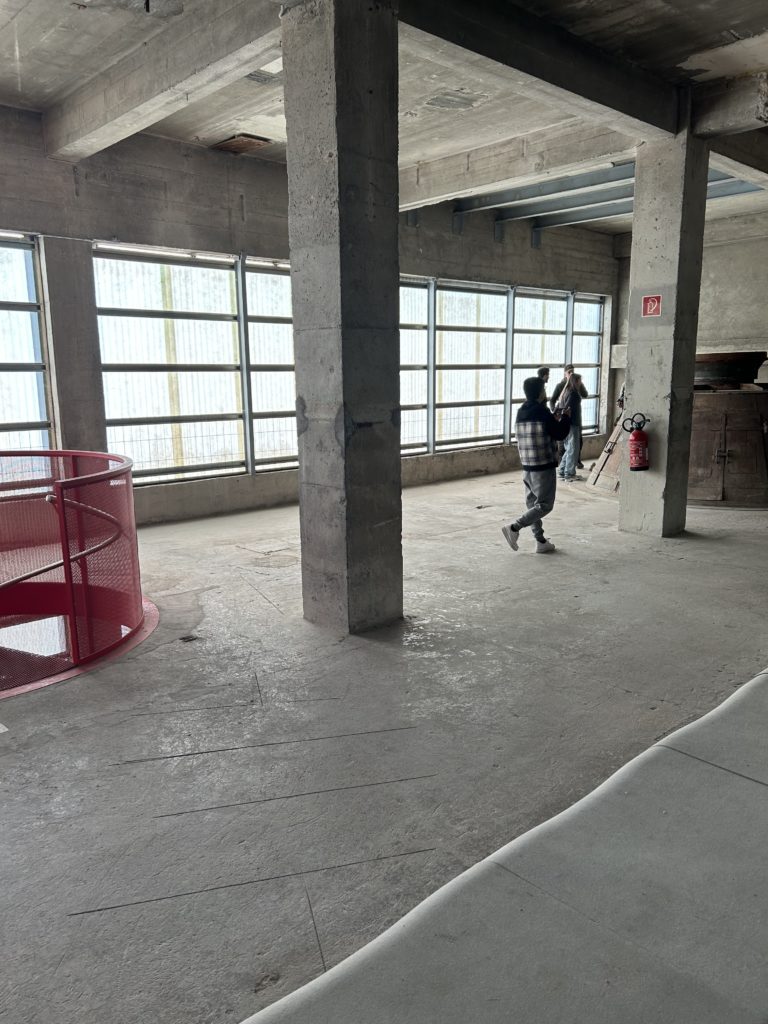
Saceba - 3rd floor
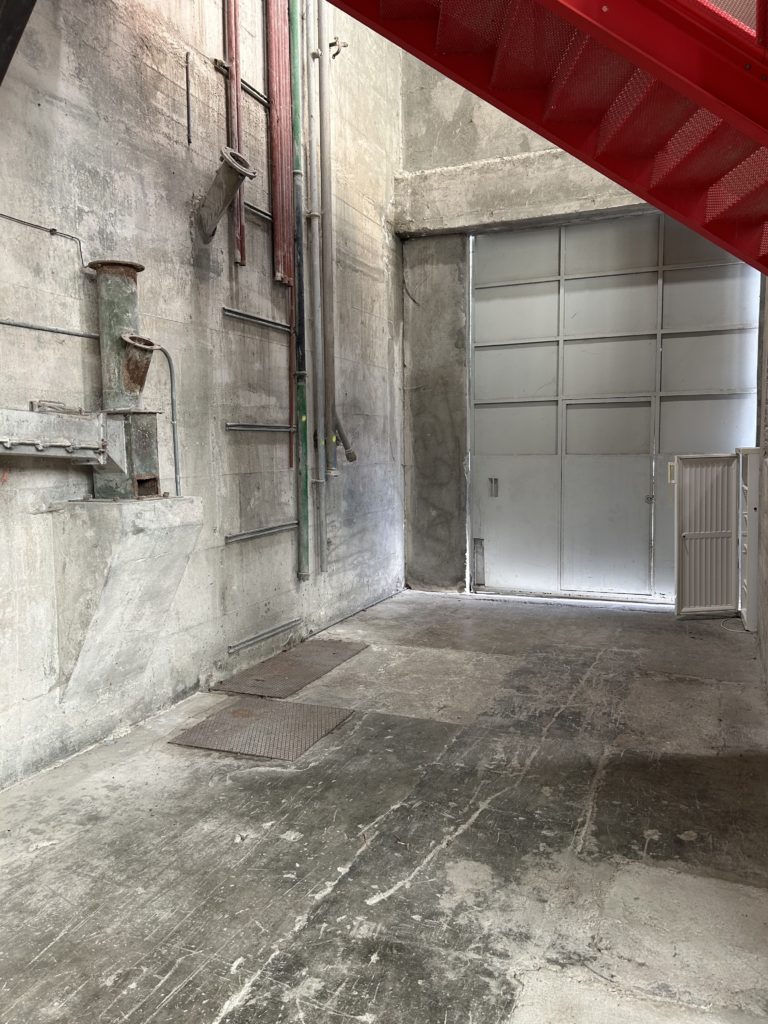
Saceba - ground floor
Setup
Our initial idea was to use a spacious room that would allow multiple users to interact with the entire structure simultaneously while projecting large-scale images onto a wall.
During the setup, we encountered an issue with excessive light in the chosen room (4th floor), which made the wall projections almost invisible. To address this, we had to choose between two possible solutions:
- – Selecting a different, darker space within the structure
- – Using a screen to display the images
The first option would have improved the visibility of the projected images, but the colors of the structure would have appeared less vibrant. Additionally, the only available darker space was small to allow for proper interaction with the structure.
The second option would have allowed us to preserve the vivid colors and maintain a spacious area for engagement. However, due to the excess light, we had to use a screen, which reduced the overall image size and visibility.
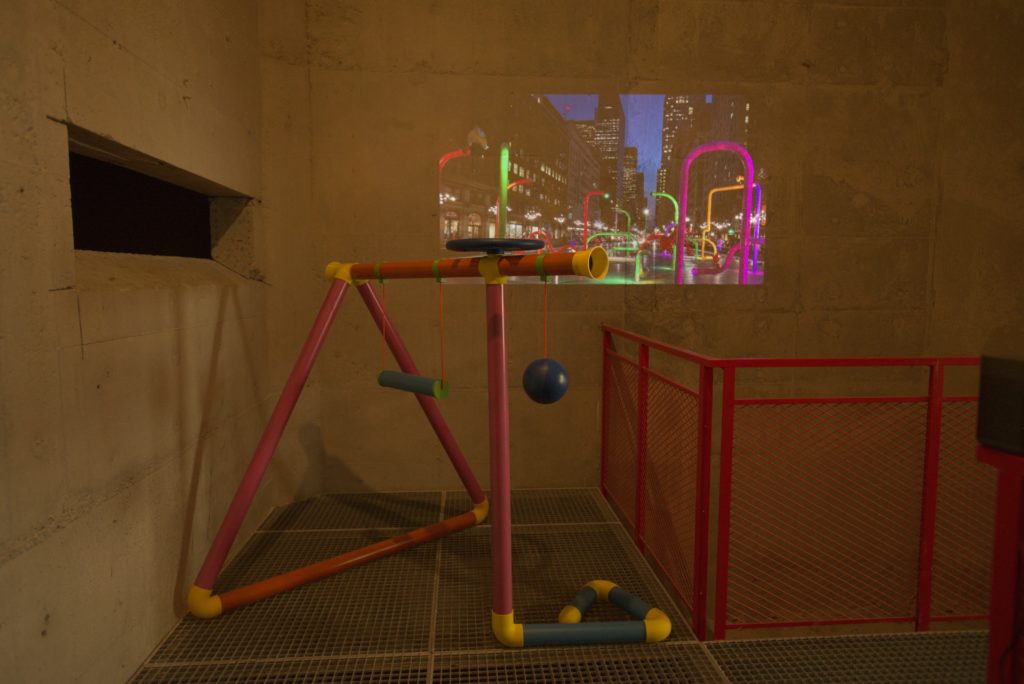
Option 1 - locate the structure in a darker environment
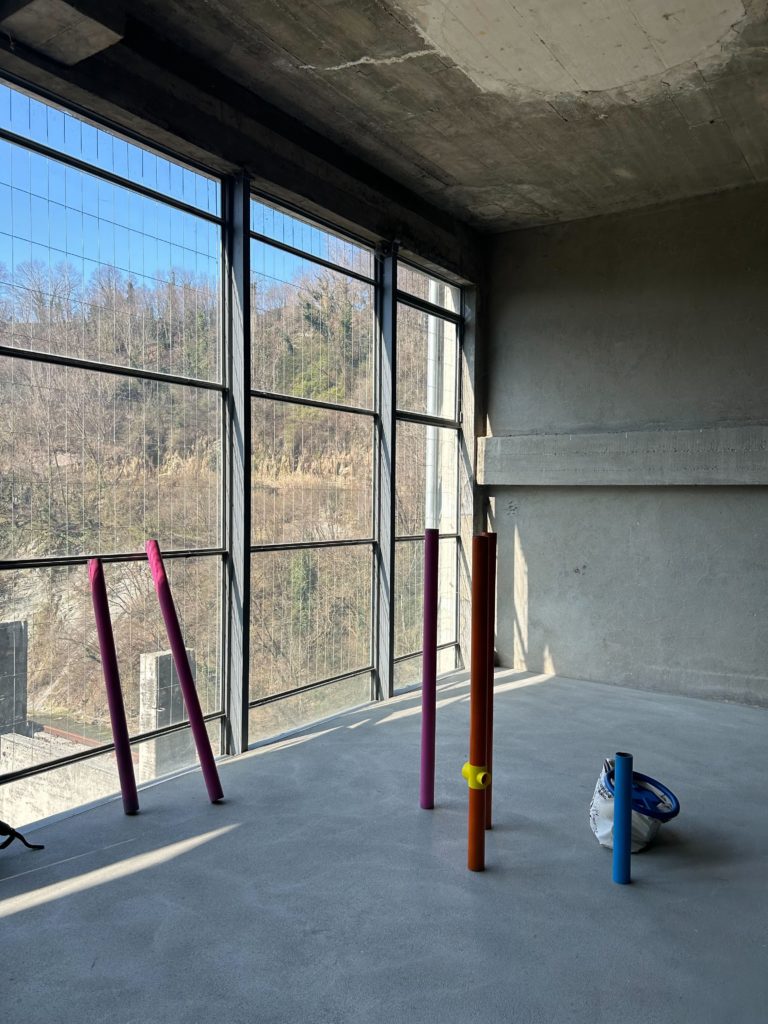
Option 2 - wider and lighter room
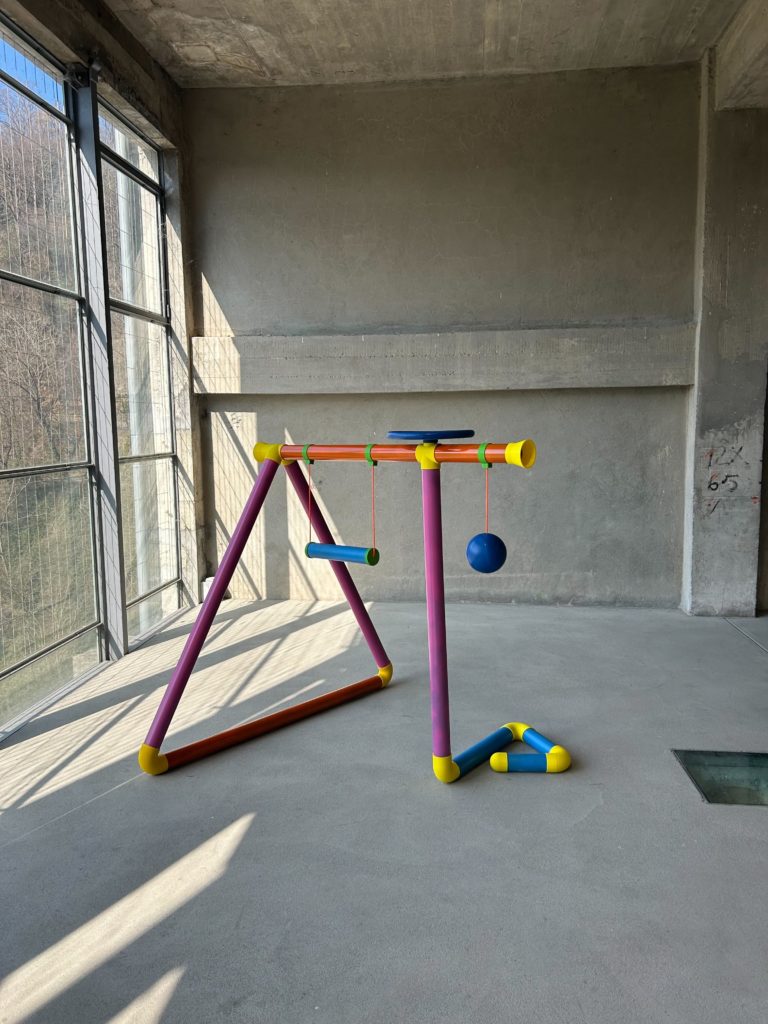
Option 2 - structure in the room
In the end, we opted for the second option, as we determined that the strength of our installation lay in the structure itself rather than the projected images.
The images would still be visible, just at a smaller size.
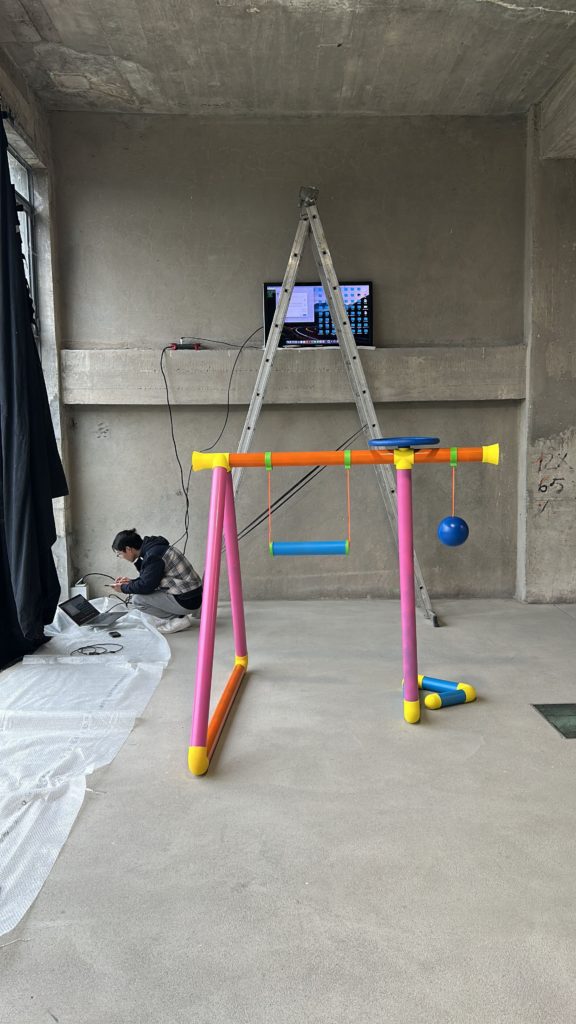
Setting up for the installation
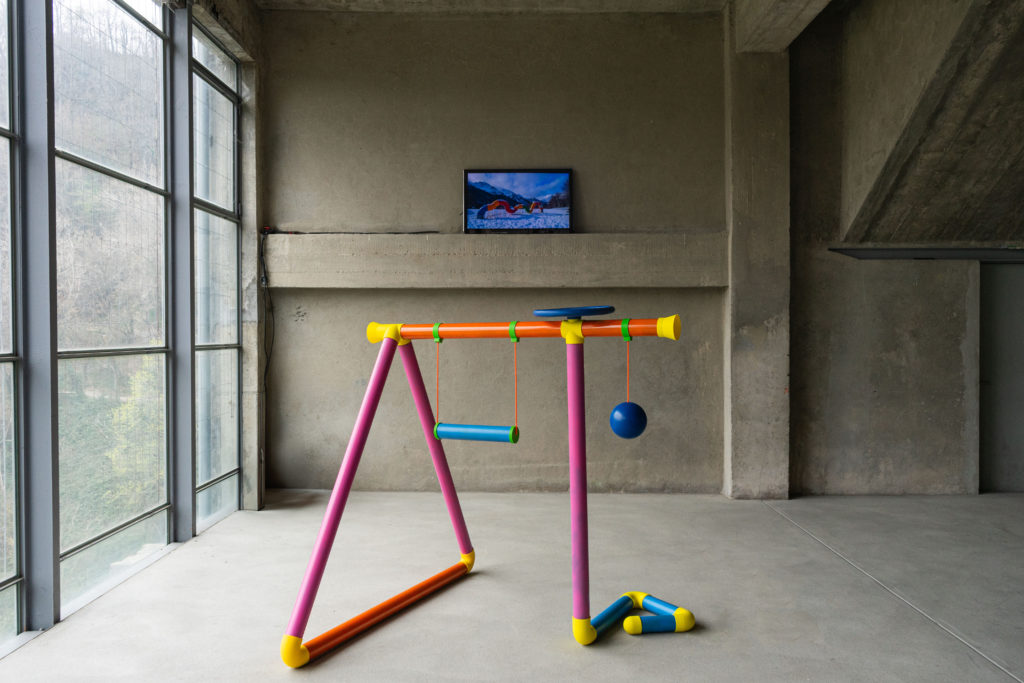
Final setup
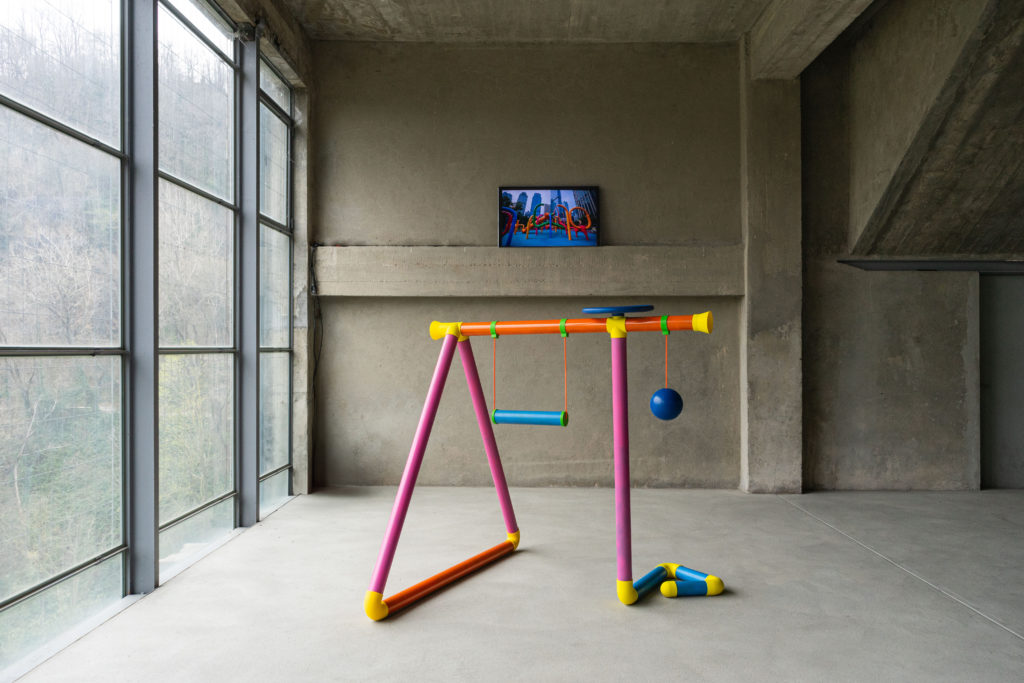
Final setup

Final setup
References
Playground inspirations: https://publicdelivery.org/tag/art-playground/
Sounds inspiration – Boomwhackers: https://organology.net/instrument/boomwhackers/
Myco – Jen Lewin Studio: https://www.jenlewinstudio.com/portfolio/myco/
Andante – Jen Lewin Studio: https://www.jenlewinstudio.com/portfolio/andante/
Playground sculpture Changi’s Airport – Carve Studio: https://www.carve.nl/nl/item/250
Billie Holiday Playground – Carve Studio: https://www.carve.nl/nl/item/1
Cloud Playground – Carve Studio: https://www.carve.nl/nl/item/213
Design Outlet Cheshire Oaks – Carve Studio: https://www.carve.nl/nl/item/247
Exhibition space – EX Cementificio Saceba, Morbio Inferiore: https://www.ticino.ch/it/commons/details/Percorso-del-cemento/117971.html